LogoLogo
  • What is MANGO Canvas?
  • MANGO Canvas Manual Index
  • Canvas Application
  • Return to Main Manuals
  • Tips & Tricks for MANGO Canvas
    • Importing Scores
    • Importing Test or Quiz from Moodle
    • Clarifying Assignment Categories and Weight
    • Fixing corrupted Thai Language
    • Regrade
    • Interactive Video
    • Video Immediate Viewing without New Window
  • Creating Course
    • Creating Course Via Course Portal
  • Adding Course's Content
    • Adding Contents
      • External URL
      • Upload Files
      • Discussions
      • Zoom
    • Peer Reviews Settings
    • Importing Content from Moodle to Mango Canvas
    • Importing Content from Existing Course in Canvas
    • Data Recovery
  • Quizzes & Assignment
    • Quizzes vs New Quizzes
    • Quizzes
      • Question Banks
        • Moving Question to Other Bank
        • Moving Question Bank to Other Course
      • Essay Question
      • File Upload Question
      • Fill In The Blank
      • Fill In Multiple Blanks
      • Formula Question
      • Matching
      • Multiple Answers
      • Multiple Choice
      • Multiple Dropdowns
      • Numerical Answer
      • Text (No Question)
      • True/False
    • New Quizzes
      • Item Bank
        • Manage Item Bank
        • Adding Questions from the Bank to Quizzes
        • Sharing Item Bank
      • Moderate
      • Categorization
      • Essay
      • File Upload
      • Fill in the blank
      • Formula
      • Hot Spot
      • Matching
      • Multiple Answer
      • Multiple Choice (New Quizzes)
      • Numeric
      • Ordering
      • True or False (New Quizzes)
      • Stimulus
    • Assignment
      • Download All the Submitted Files from the Students
      • Download All the Submitted Files from the Students (from Gradebook)
  • Course Design
    • Set Expectations
      • Creating Rubrics
      • Adding Outcome
      • Gradebook Settings
    • Customizing Navigation
      • Creating Pages
      • Setting the Home Page
      • Managing Course Navigation
      • Creating Modules
    • Module Access Conditions
      • Prerequisites
      • Requirements
    • SpeedGrader
      • Get Started with SpeedGrader
    • Assign Group Work
      • Manage Group Set
      • Manage Student Group
  • Communicating with Students
    • Inbox Message
    • Announcement
  • Mange Course Participants
    • Adding Course Participants
    • Role Permissions
    • Invite Using Invitation Link
    • Modifying the Roles in a Course
Powered by GitBook
On this page
  • Getting Started with Announcement
  • Announcement Toolbar
  • Displaying Announcements
  • Creating Announcement
  • Configurations
  • Locking and Unlocking Announcement
  • Deleting Announcement
  1. Communicating with Students

Announcement

Communicate with students through announcements using the announcement.

PreviousInbox MessageNextAdding Course Participants

Last updated 1 year ago

Getting Started with Announcement

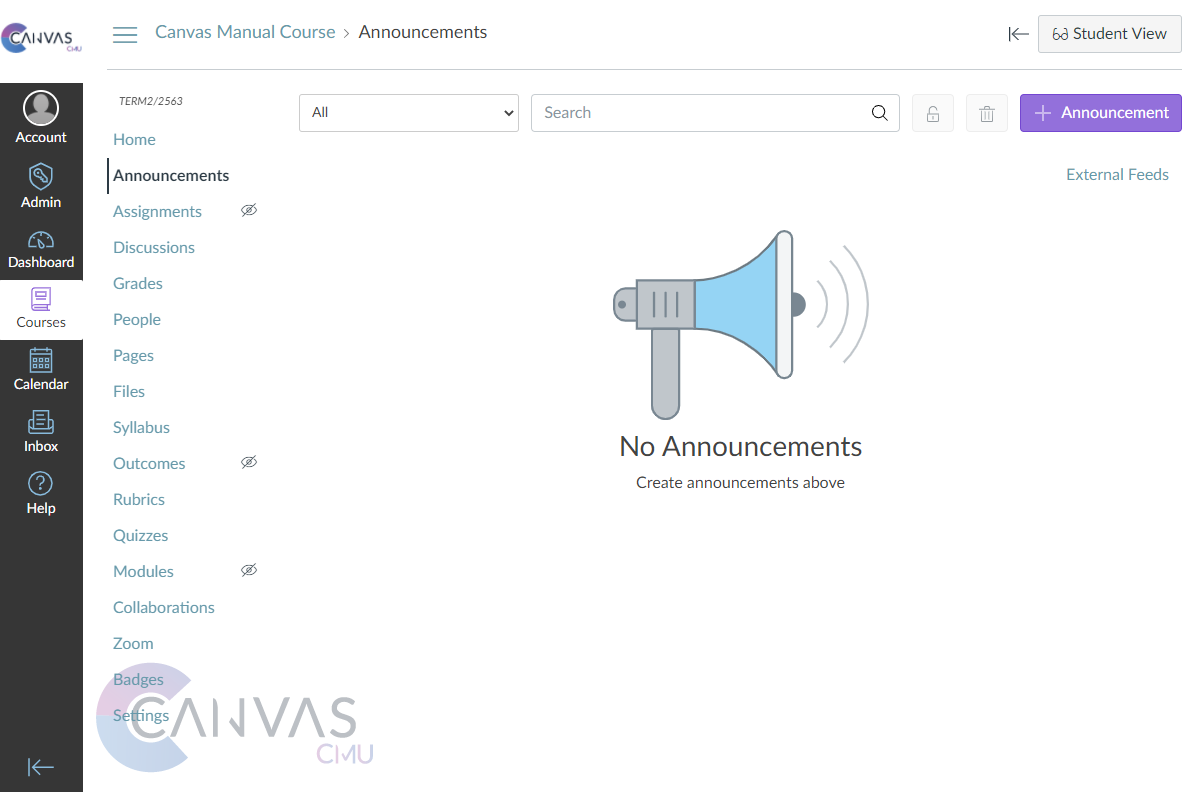
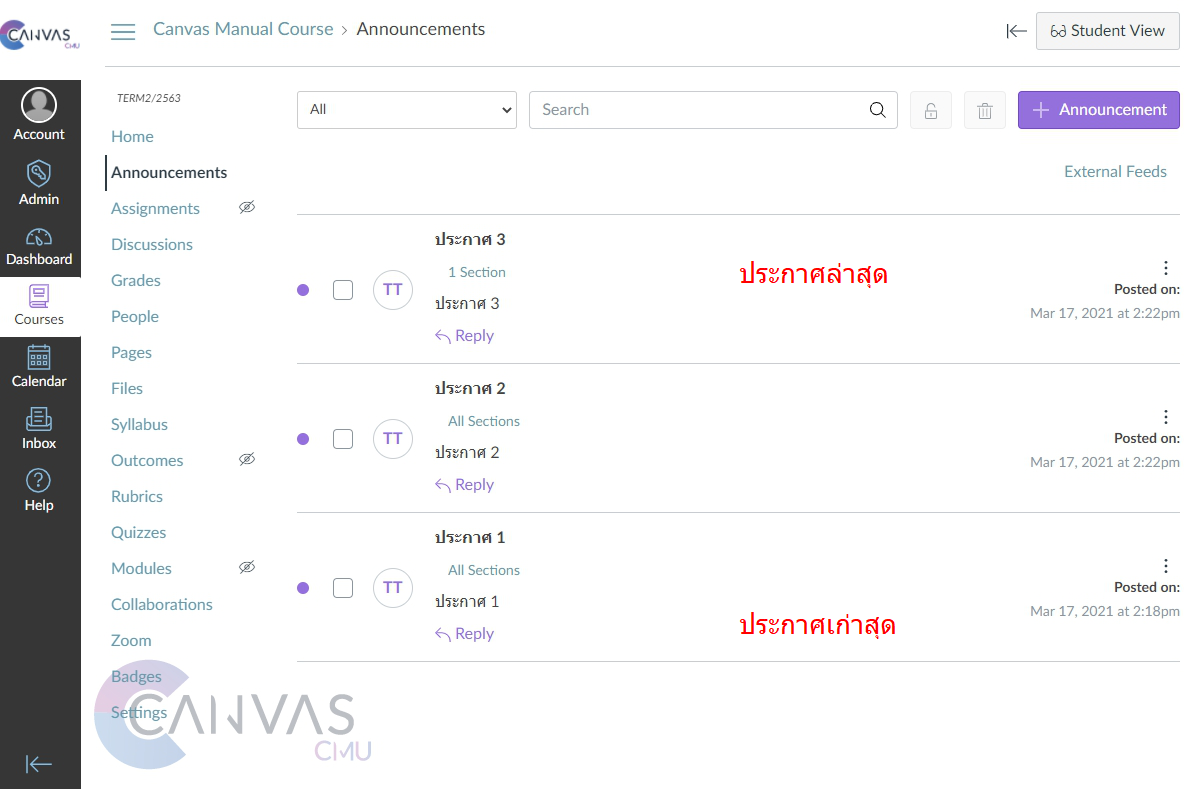
The first step, go to the "Announcement" menu, the window as shown in the picture will appear.
Announcement Toolbar

Displaying Announcements

The latest announcement will always be at the top. If it is a scheduled announcement, it will also be at the top, but will not be visible to students until the specified date and time. The system will then automatically post the announcement.
Creating Announcement

Configurations

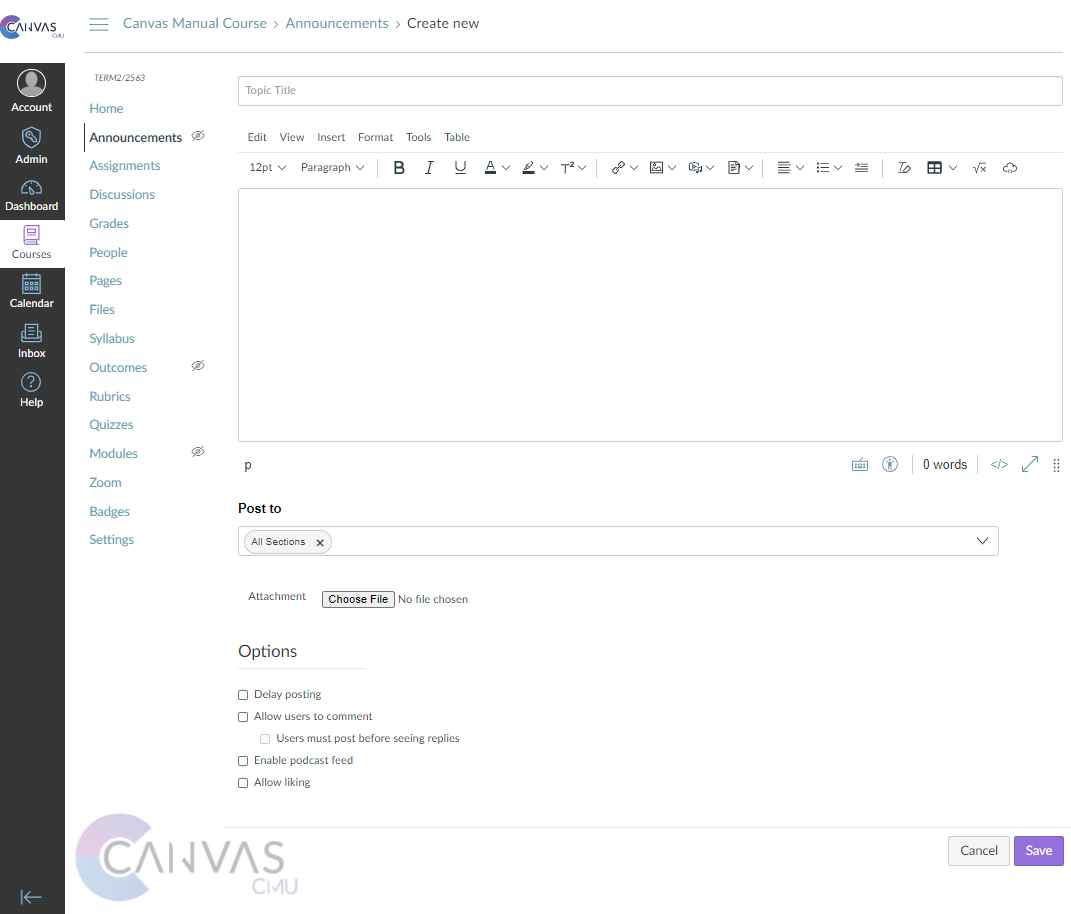
  1. Topic Title

  2. The content: the announcement can include text and attached images, as well as images. *Note: Details must be filled in this section, otherwise you will not be able to press Save to create the announcement.

  3. Post to: select the course you want to notify about the announcement. You can select the course you want.

  4. Options

    1. Delay Posting: Setting the time for posting announcements. You can set the date and time in advance.

    2. Allow users to comment: Allow users to comment on the announcement.

    3. Allow 'liking':

      1. Only graders are allowed to 'like'

      2. Sort by 'likes'

Locking and Unlocking Announcement

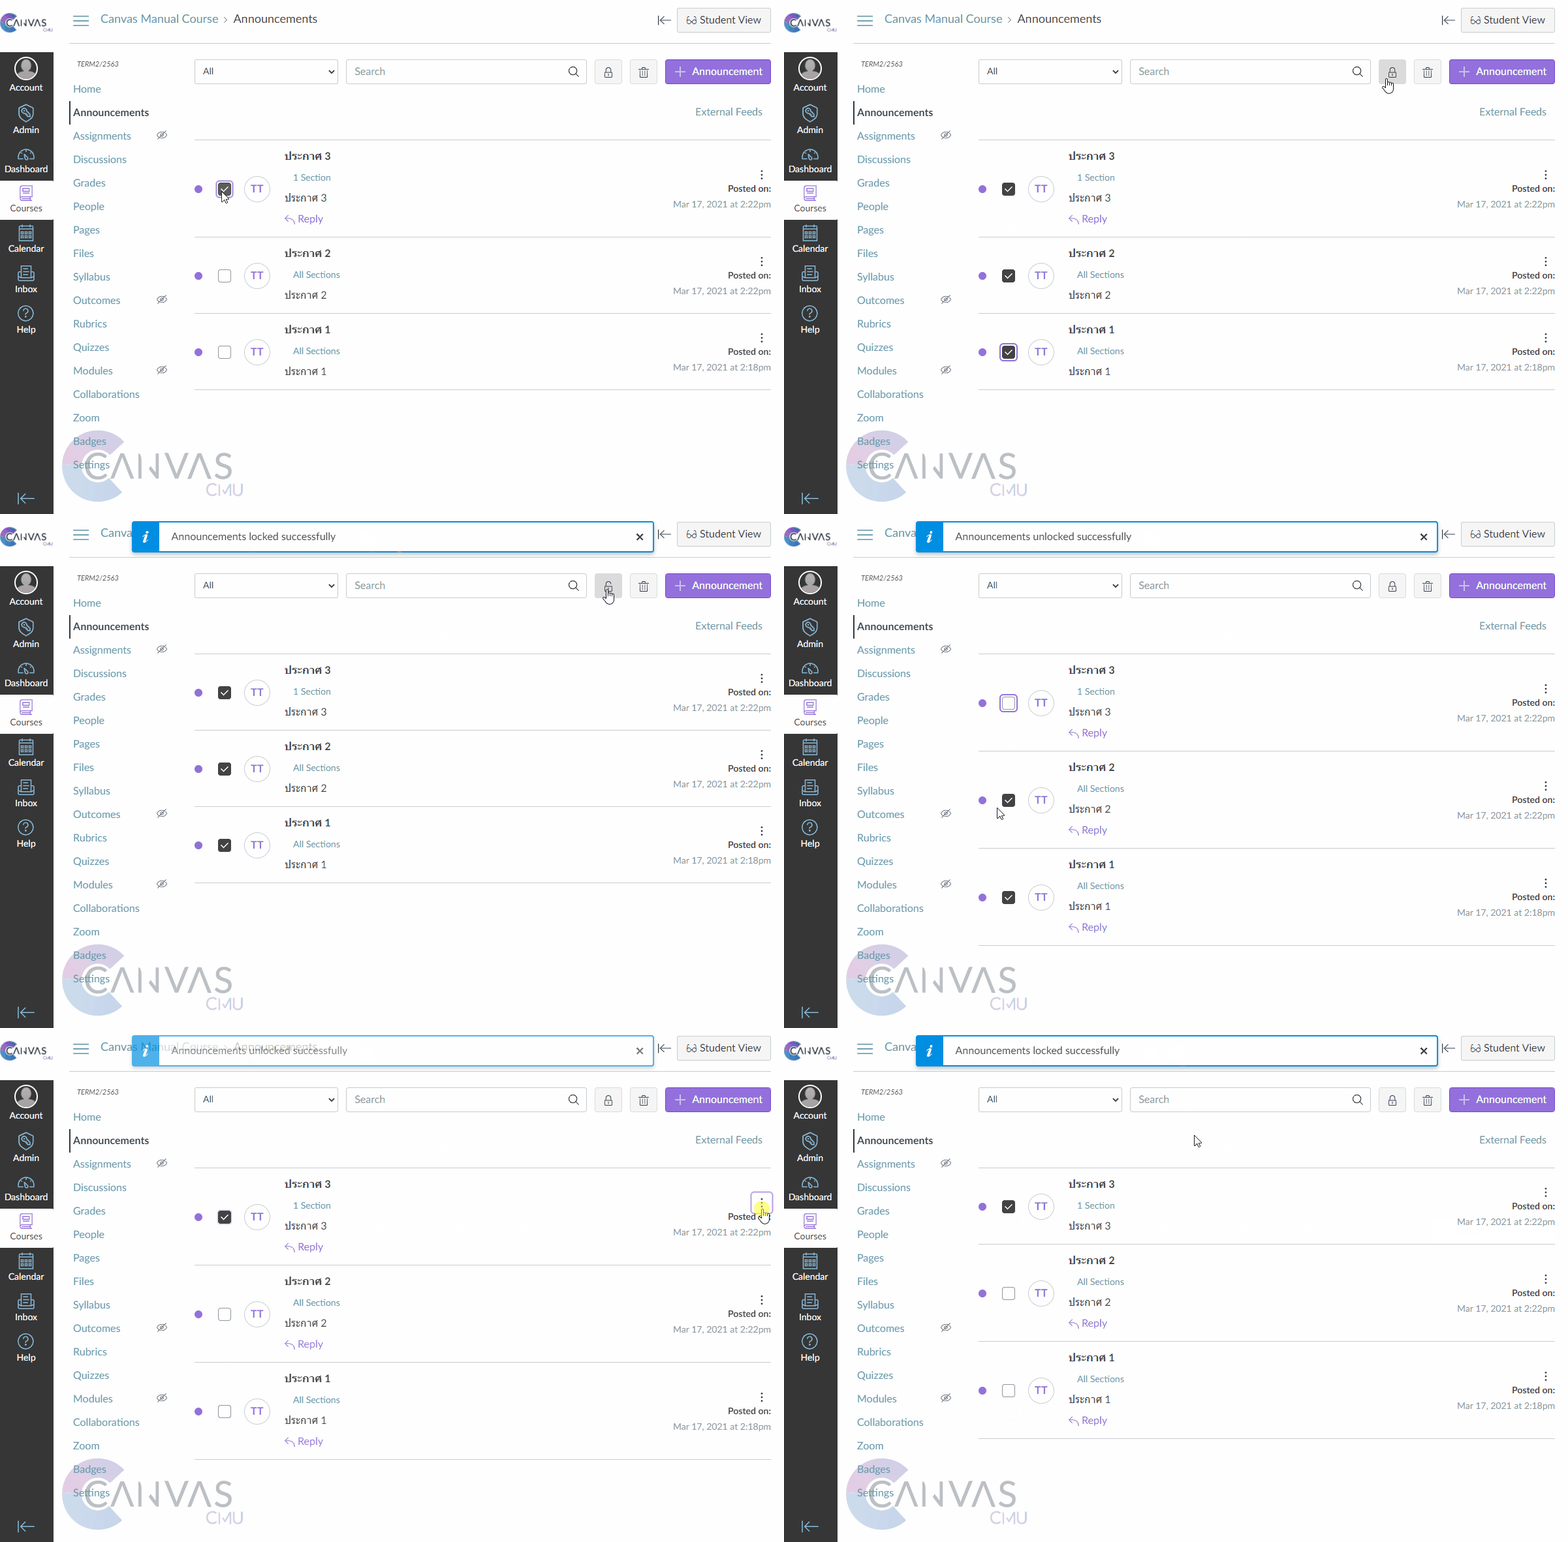
Locking an announcement means closing it to comments from viewers. There are 2 ways to do this:

  1. Click the three-dot icon, then select 'Disallow Comments' from the menu.

Unlocking an announcement means allowing viewers to comment on it. There are 2 ways to do this:

  1. Click the three-dot icon, then select 'Allow Comments' from the menu.

Deleting Announcement

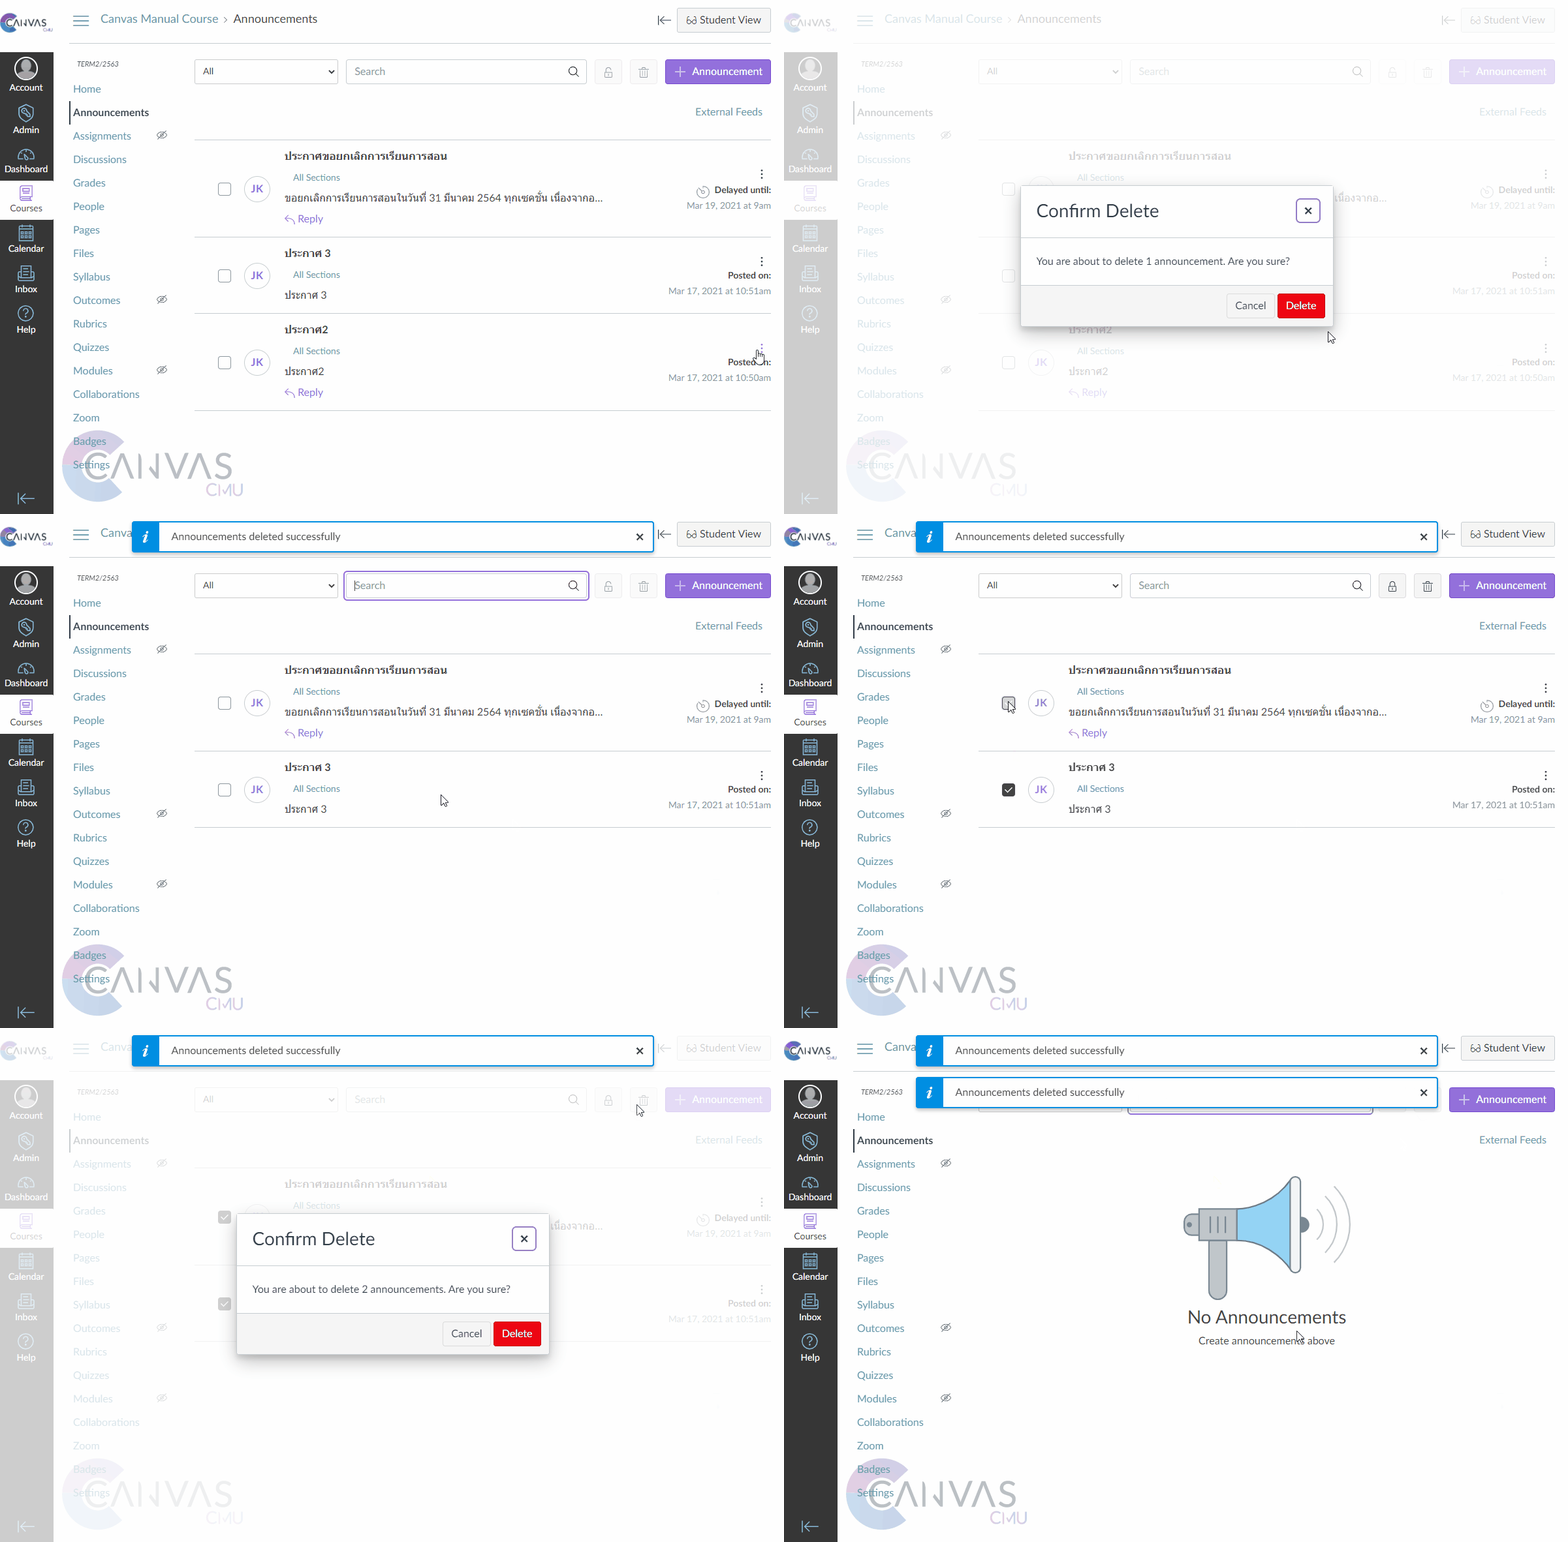
There are 2 possible ways to delete the announcement.

  1. Click the three-dot icon, then select 'Delete' from the menu.

  2. Select the announcement and click on the trash icon at the toolbar.

The system will notify to confirm the deletion. Press "Delete" to confirm the deletion.

You can choose to display announcements by course or display announcements from all courses [1] and can search for the announcements you want in the search box [2]. In addition, you can also create a new announcement by pressing button [3] as well as view External Feeds [4].

Click to create a new annoucement.

Enable podcast feed: Display the Podcast feed when you enable it, the system will display icon.

Select the post, then click the padlock icon on the toolbar.

Select the post, then click the padlock icon on the toolbar.