Manage Student Group
Student Group creation can be done automatically when creating a Group Set or instructors can create it later. By importing a .csv file, instructors can manually create depending on the design of the instructor's group division.
Automatic Student Group Creation
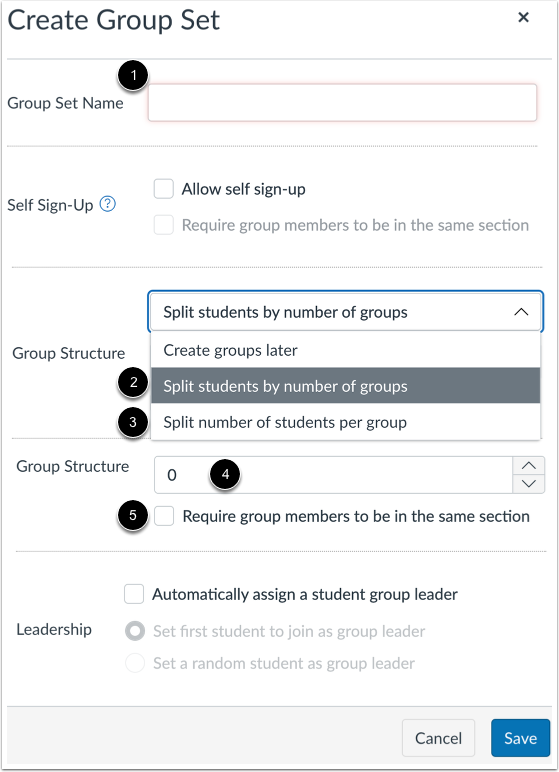
When creating a Group Set, you can allow the system to automatically create Student Groups by selecting [2] and [3] and setting additional configurations as desired.
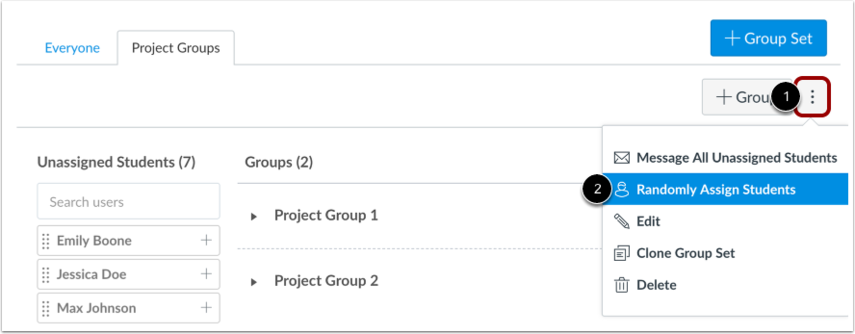
Allow the system to randomly add members to the student group by selecting the three-dot button [1] and select 'Randomly Assign Students' [2].
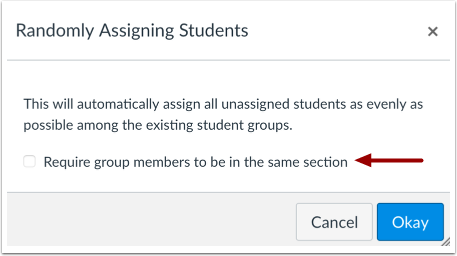
Notification window will appear. If you want the system to randomly assign members in the student group to be students in the same section, check the box in front of the text "Require group members to be in the same section".
Manual Student Group Creation
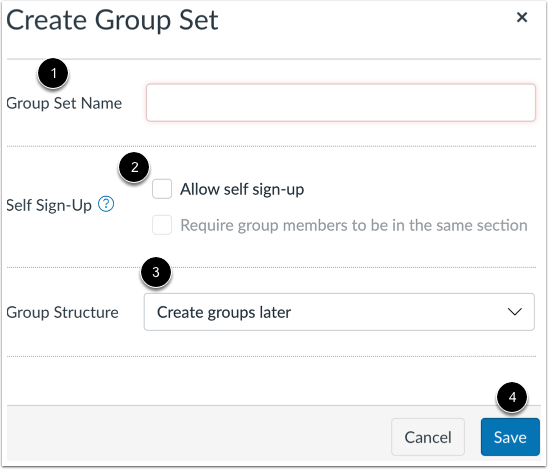
When creating a Group Set, select Create group later [3].
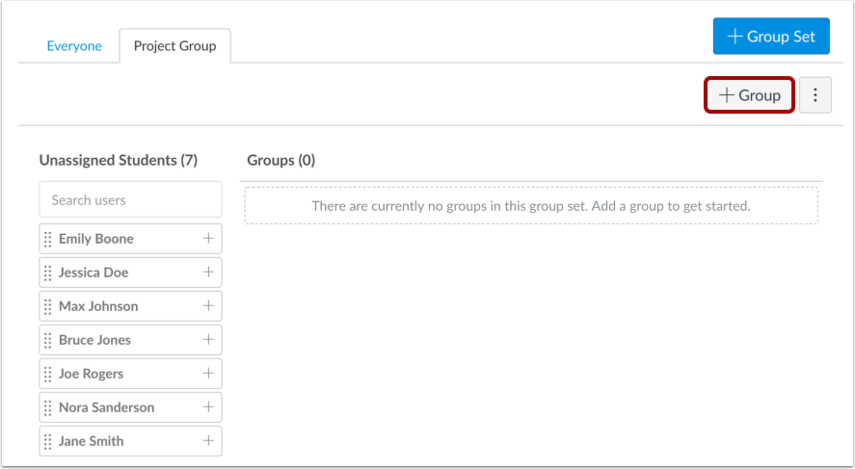
Click +Group to create a student group by yourself. The student group settings window will appear.
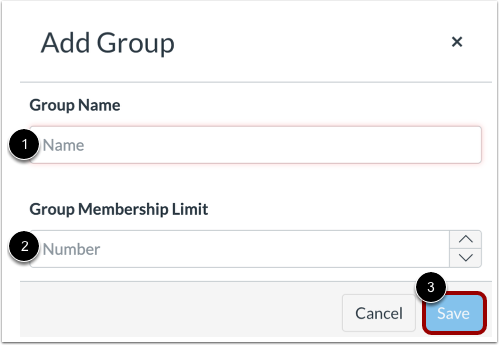
[1] Name the Student Group you want to create.
[2] Maximum number of students in the Student Group
[3] When all settings are done, click Save.
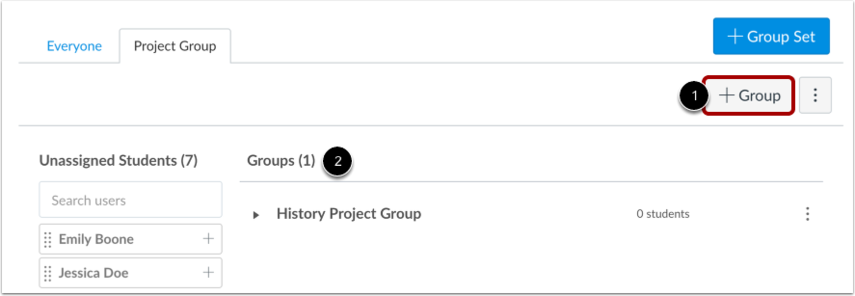
[1] Create Student Group can press +Group and create more as needed.
[2] Student Group that has been successfully created will appear in Groups.
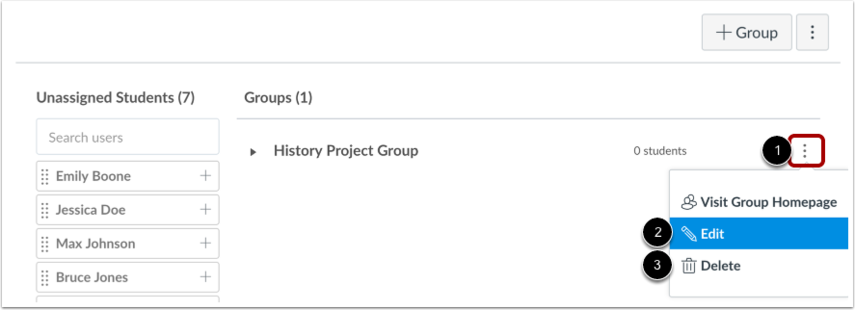
In case of editing, click the button with three dots behind the Student Group you want to [1] edit [2] or delete [3] as desired.

Select the student name you want to add, drag and drop it into the Student Group you want.

Or select the + button [1] at the back of the student's name and then select the Student Group [2] you want to add the name to.
Self Sign-Up
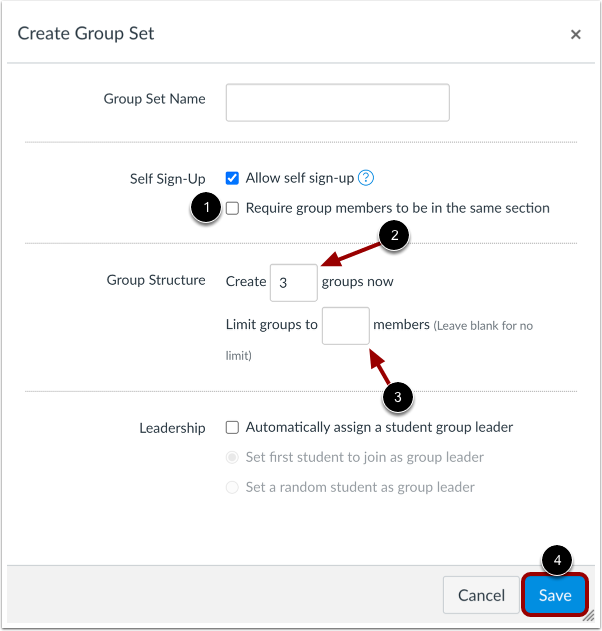
When creating a Group Set, select Self Sign-Up [1] as Allow self sign-up
[2] Set the number of Student Groups desired
[3] Maximum number of members in each Student Group
[4] Click 'Save'
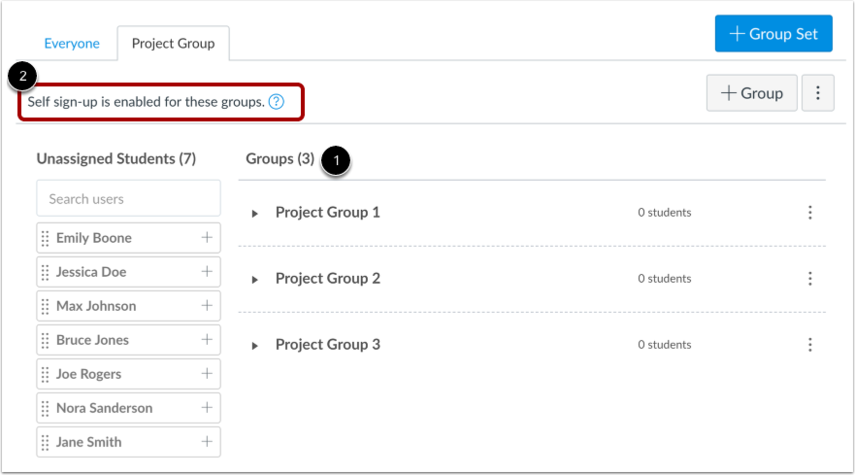
Student Group will appear in the Group Sets that you create [1] and have a message stating that students can choose to join the Student Group themselves [2].
Last updated