Inbox Message
Communicating with students through the Inbox channel works similarly to using general email. It is used for sending messages, replying to messages, organizing, as well as sending feedback.
Getting Started with Inbox
Go to the "Inbox" menu, the window as shown in the picture will appear.
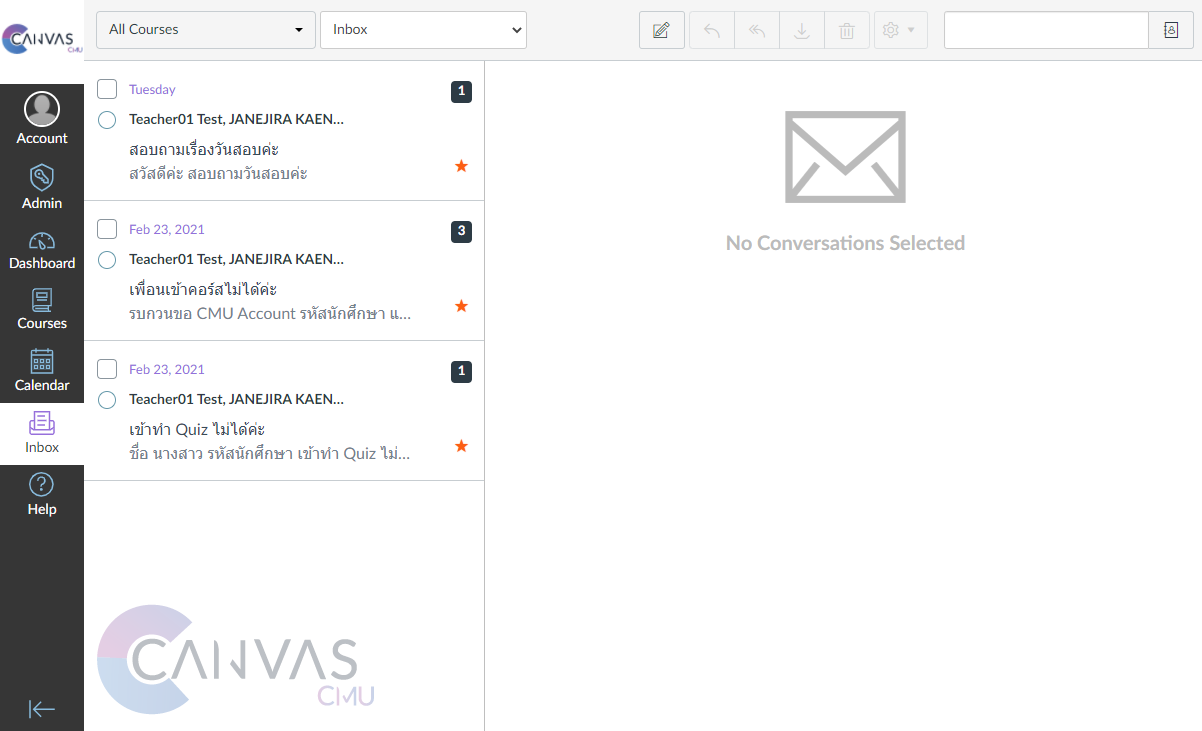
On the first page of the inbox menu, it is divided into two main parts, the left side and the right side. When you select a message from the left side, the entire content of the message will appear on the right-hand side of the window. You can view, reply to, or manage those messages.
Messages in the Inbox are arranged from newest to oldest, with the newest message appearing at the very top and the older messages at the bottom.
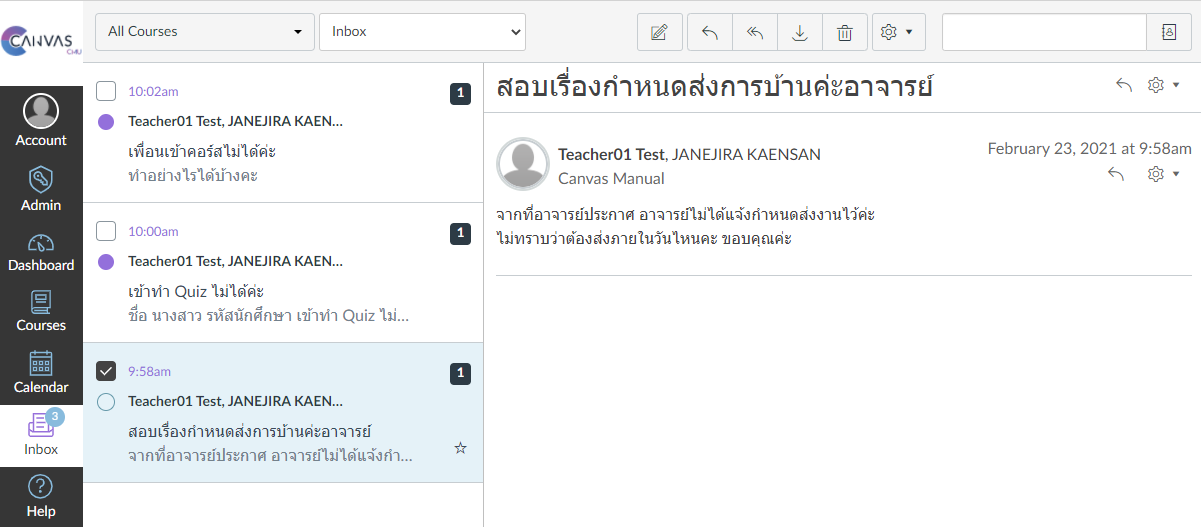
Toolbar in Inbox
You can choose to display messages by course [1] or by message type (Unread, Starred, Sent, Archived, and Submission Comments) [2]. You can compose a new message anytime by clicking on the compose icon [3]. Additionally, you can search for messages by searching for the username in this field [4].

When you select a message, you can choose to reply to that message with just one message according to the symbol in number [1] or choose to reply to all messages [2], including archiving messages [3] and deleting messages [4].
Furthermore, you can forward messages, mark them as unread or read, as well as mark them with a Star to indicate that they are important on the messages you want by clicking on the gear icon (Setting) [5].
Displaying Messages
You can choose to display the results by separating them by course in each course or display them in 'All Courses'.
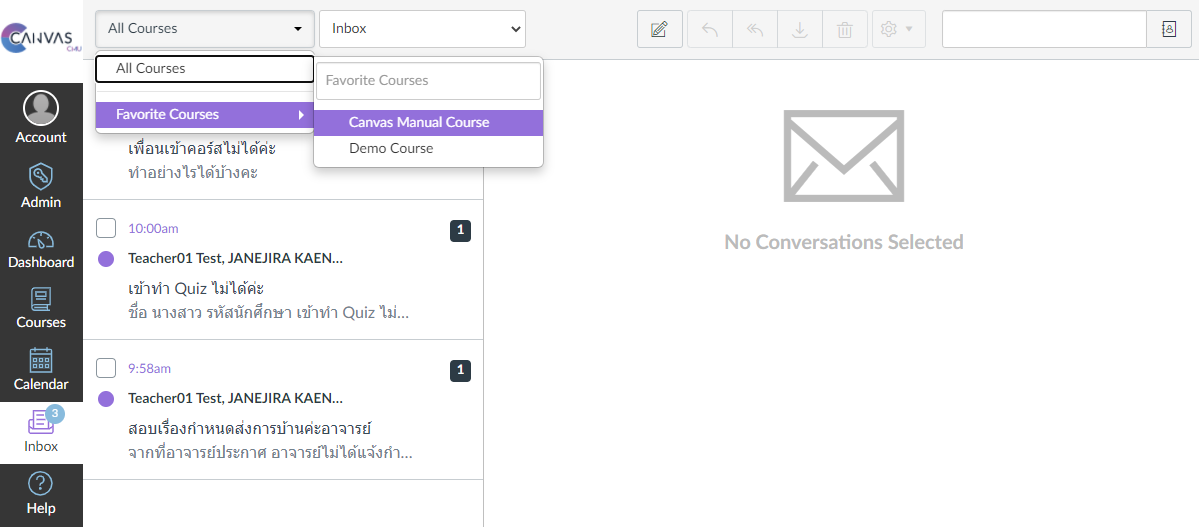
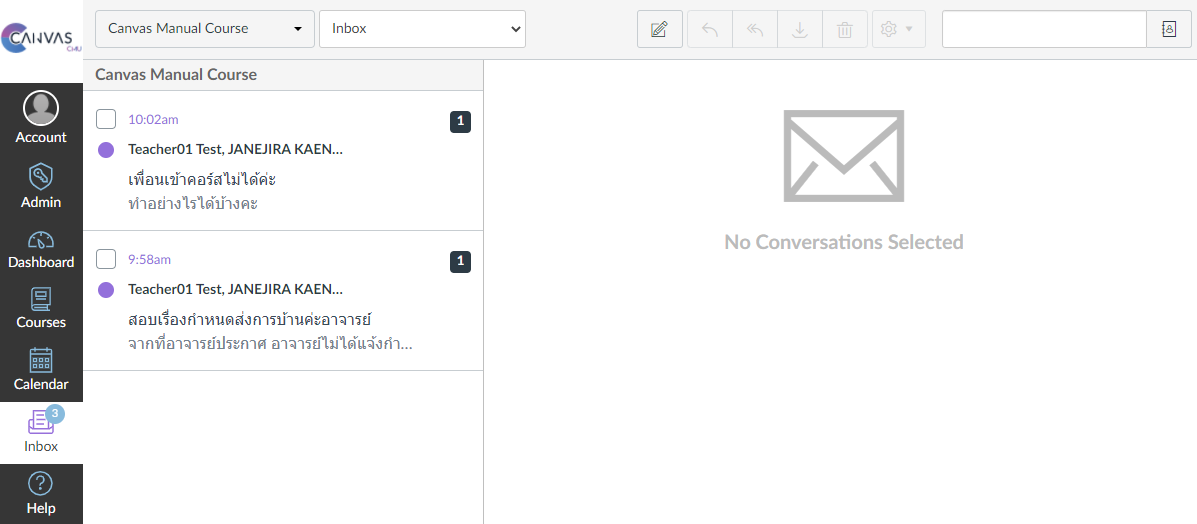
When selecting the display of the desired course, you can choose to display text according to the status of the message. The status of the messages can be divided as follows.
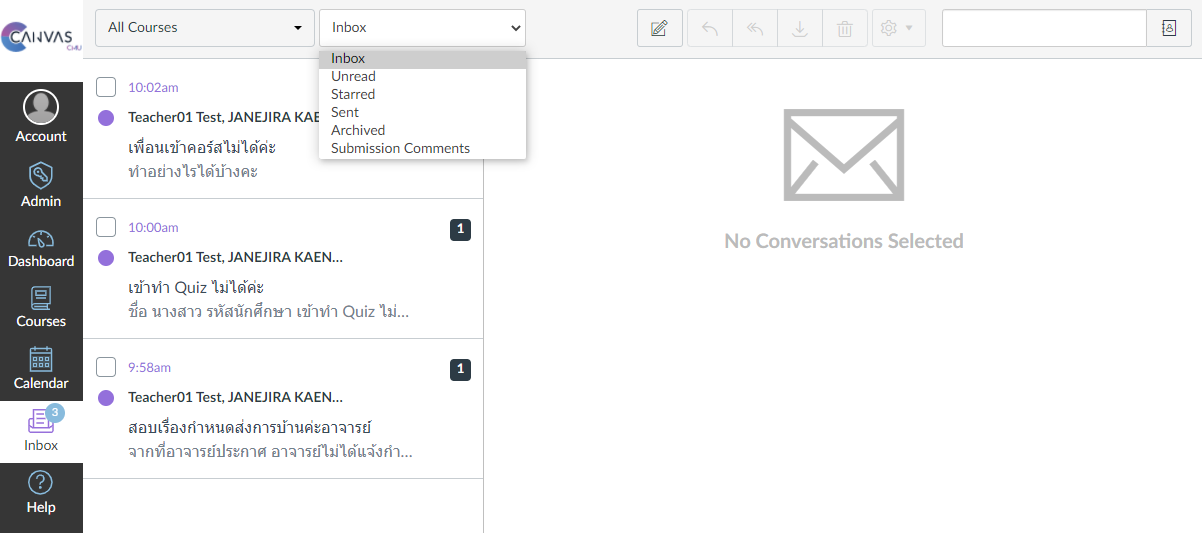
Inbox: displaying all incoming messages in the Inbox
Unread: displaying only unread messages
Starred: displaying only messages marked as important
Sent: displaying only sent messages
Archived: displaying only hidden messages
Submission Comments: displaying only comments on student assignments that can be directly commented on through the Inbox (only teachers and students can view Submission Comments)
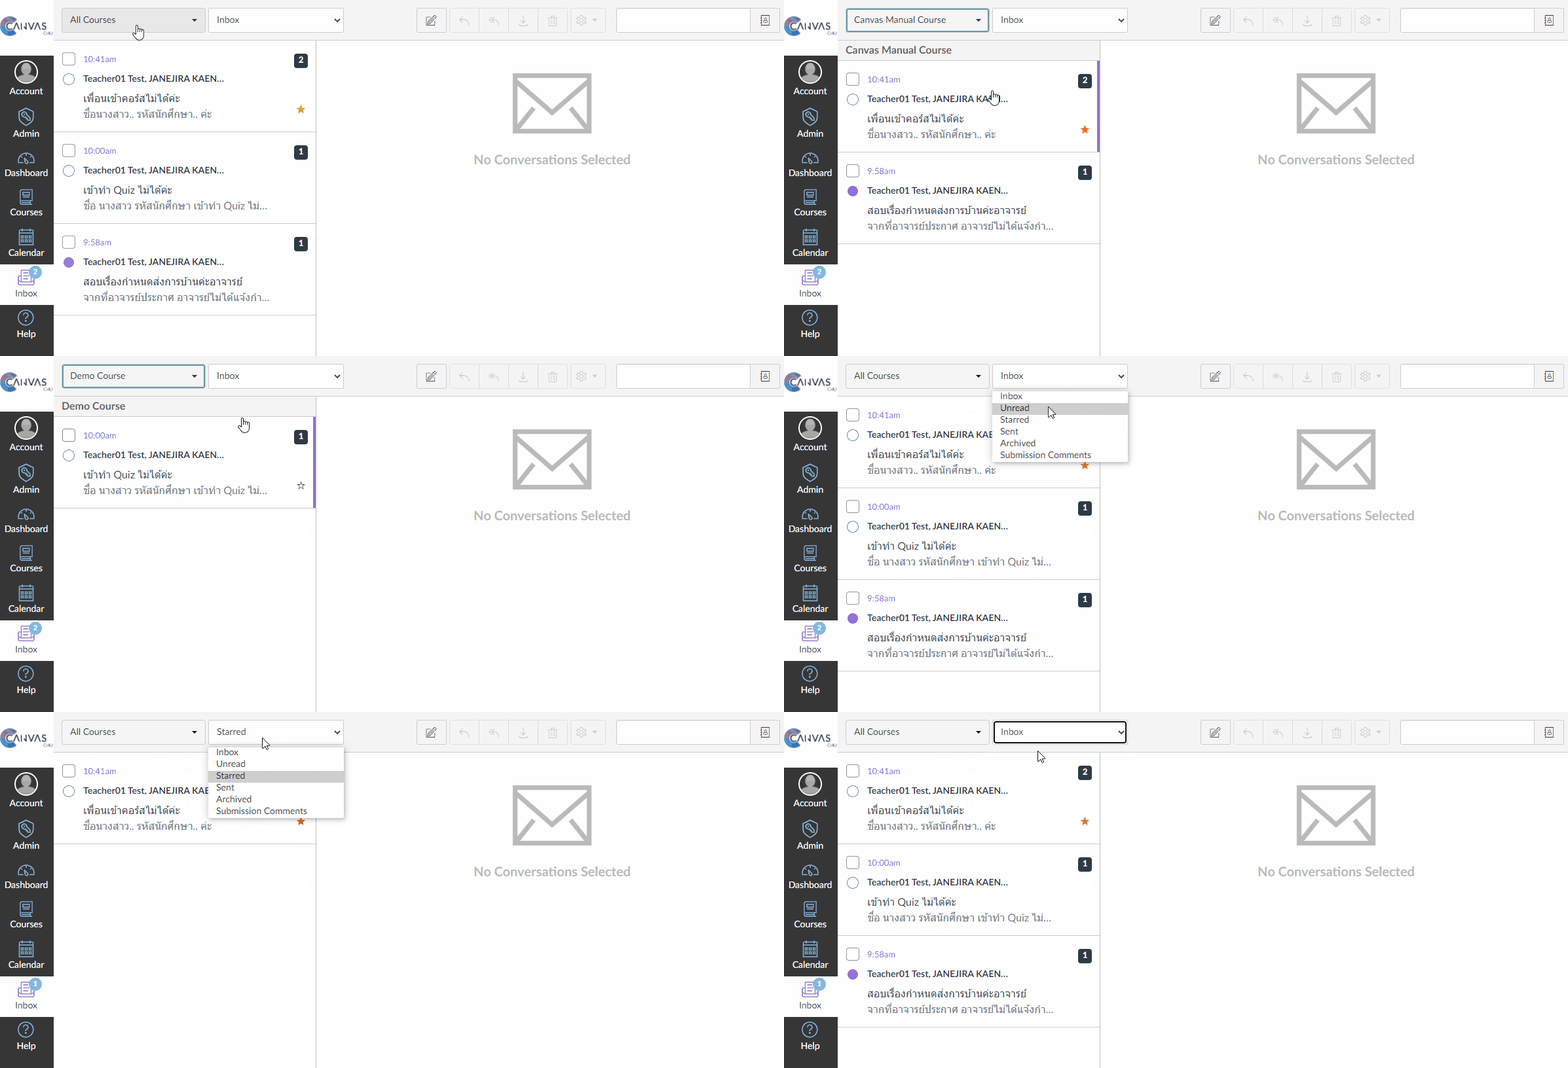
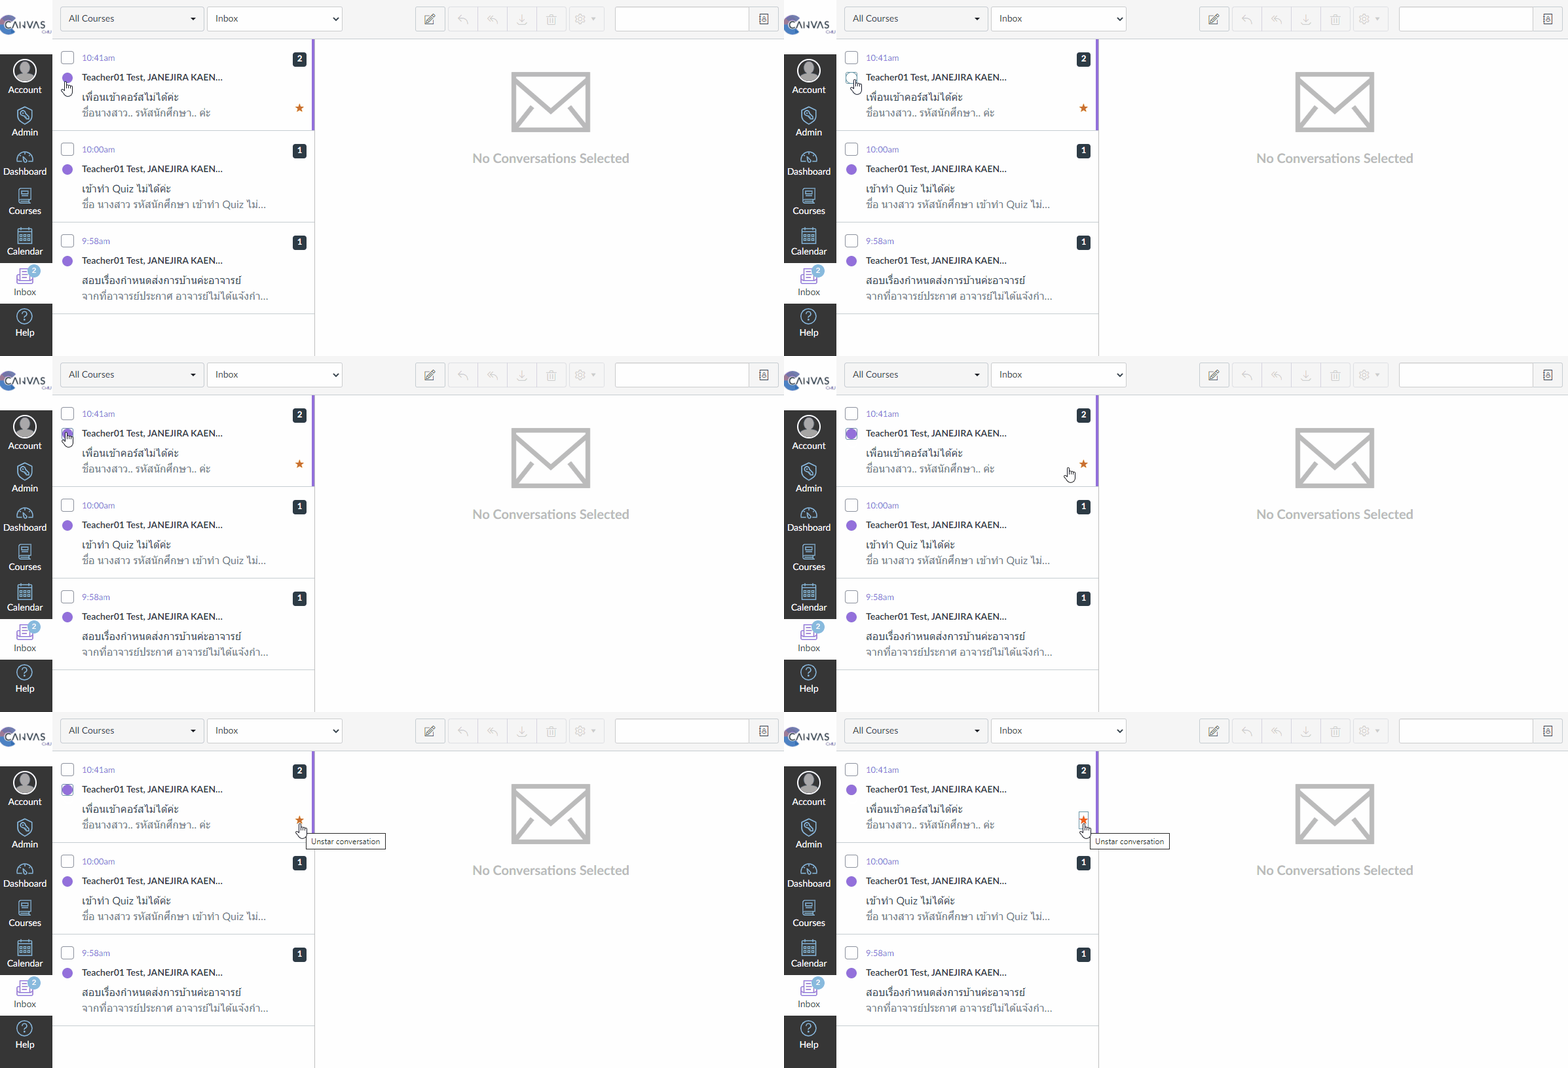
Tips: You can choose to mark whether you have read this message or not by clicking on the ⚪ mark, and you can choose to Star the message by clicking on the ⭐ displayed on the example below.
Composing and Sending Message
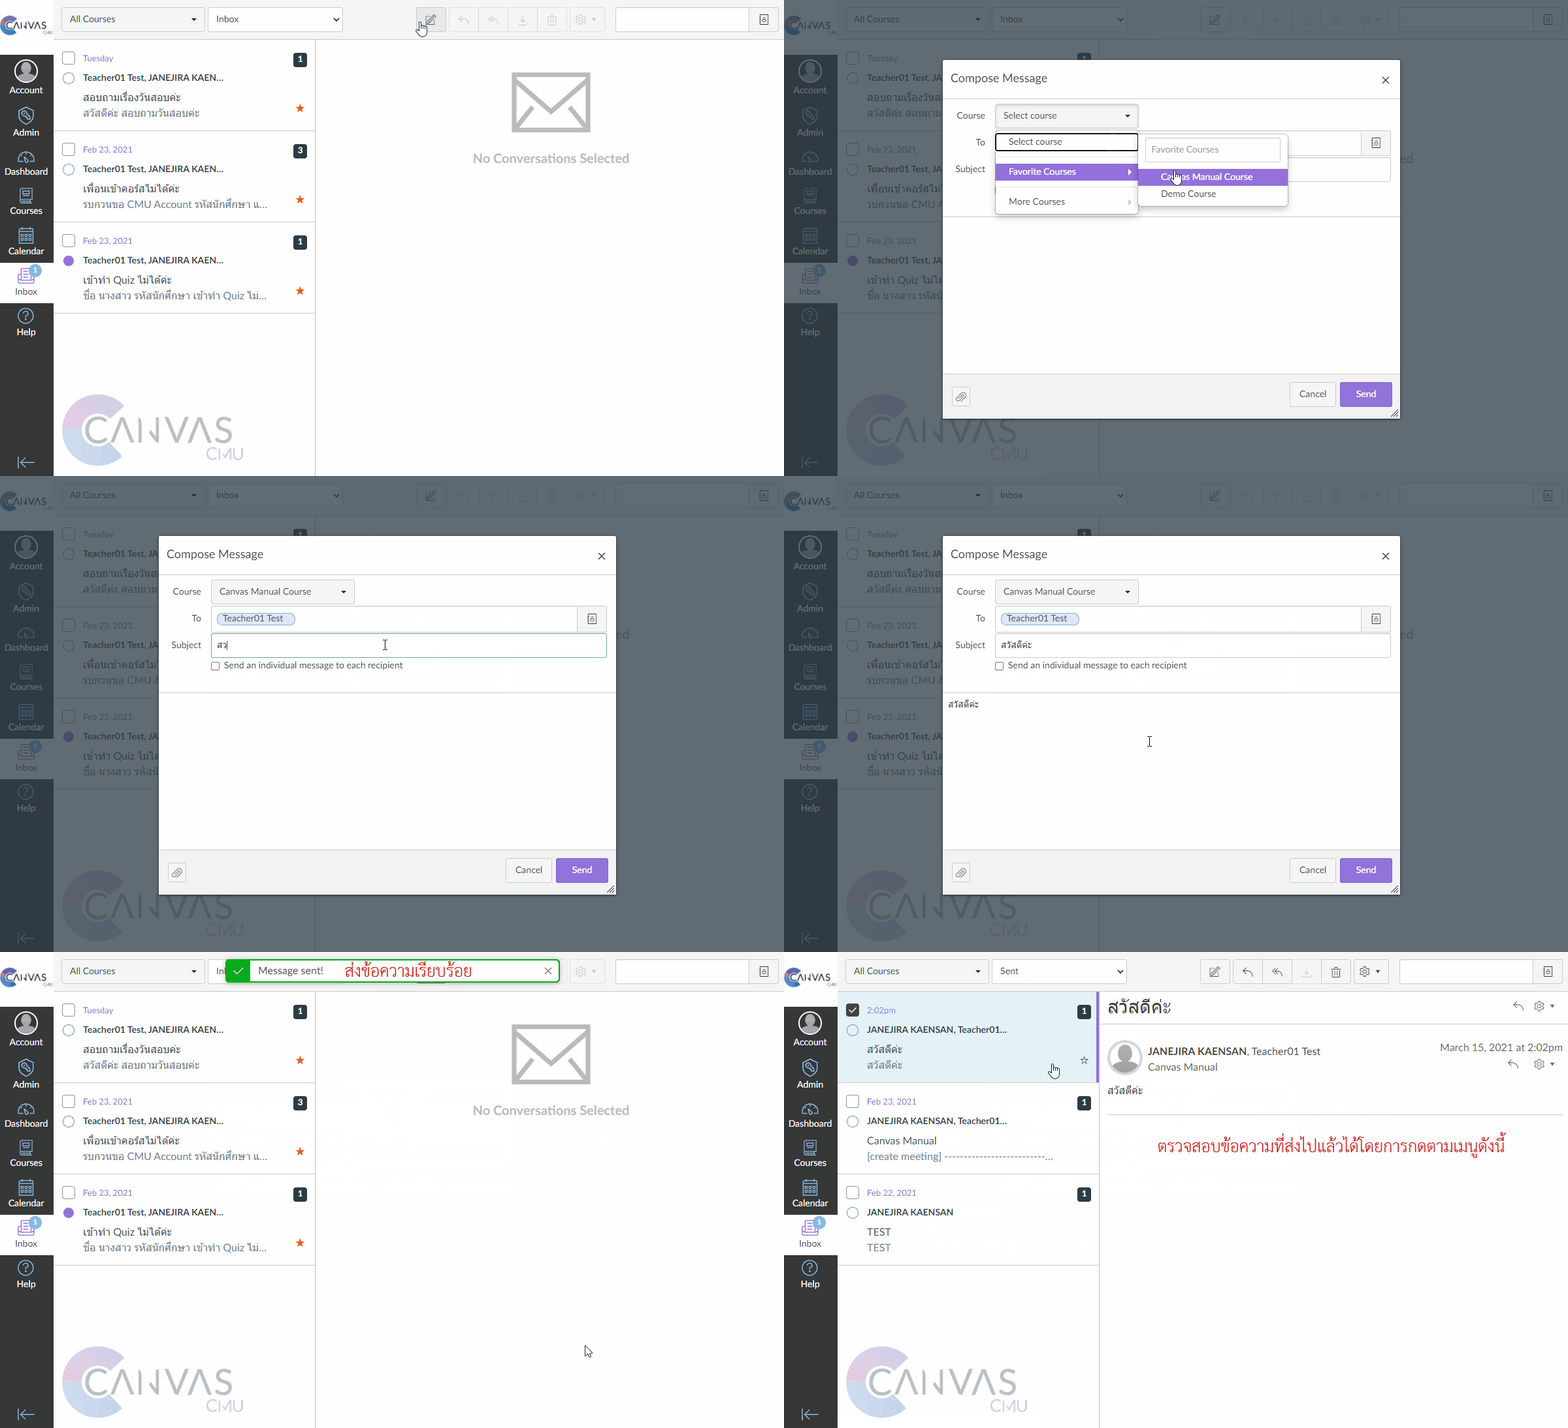
You can write and send messages as follows.
Click on 'Compose a message'
 a window will appear like shown below.
Select the course you want to send a message to.
Select the recipient you want to send to in the To field, you can choose to send as follows:
Send to all individuals in the course.
Send only to the instructors in the course.
Send only to the students in the course.
Send to individuals in the selected section.
Send individually by typing the recipient's name in the To field. You can press the address book icon to select the recipient's name without typing a search.
Write the message subject in the Subject field and write the message content in the message box, you can also attach files by clicking the attachment icon
 .
. Click to send message.
Note: There is no file size limit for attaching files in Inbox.
Replying Message
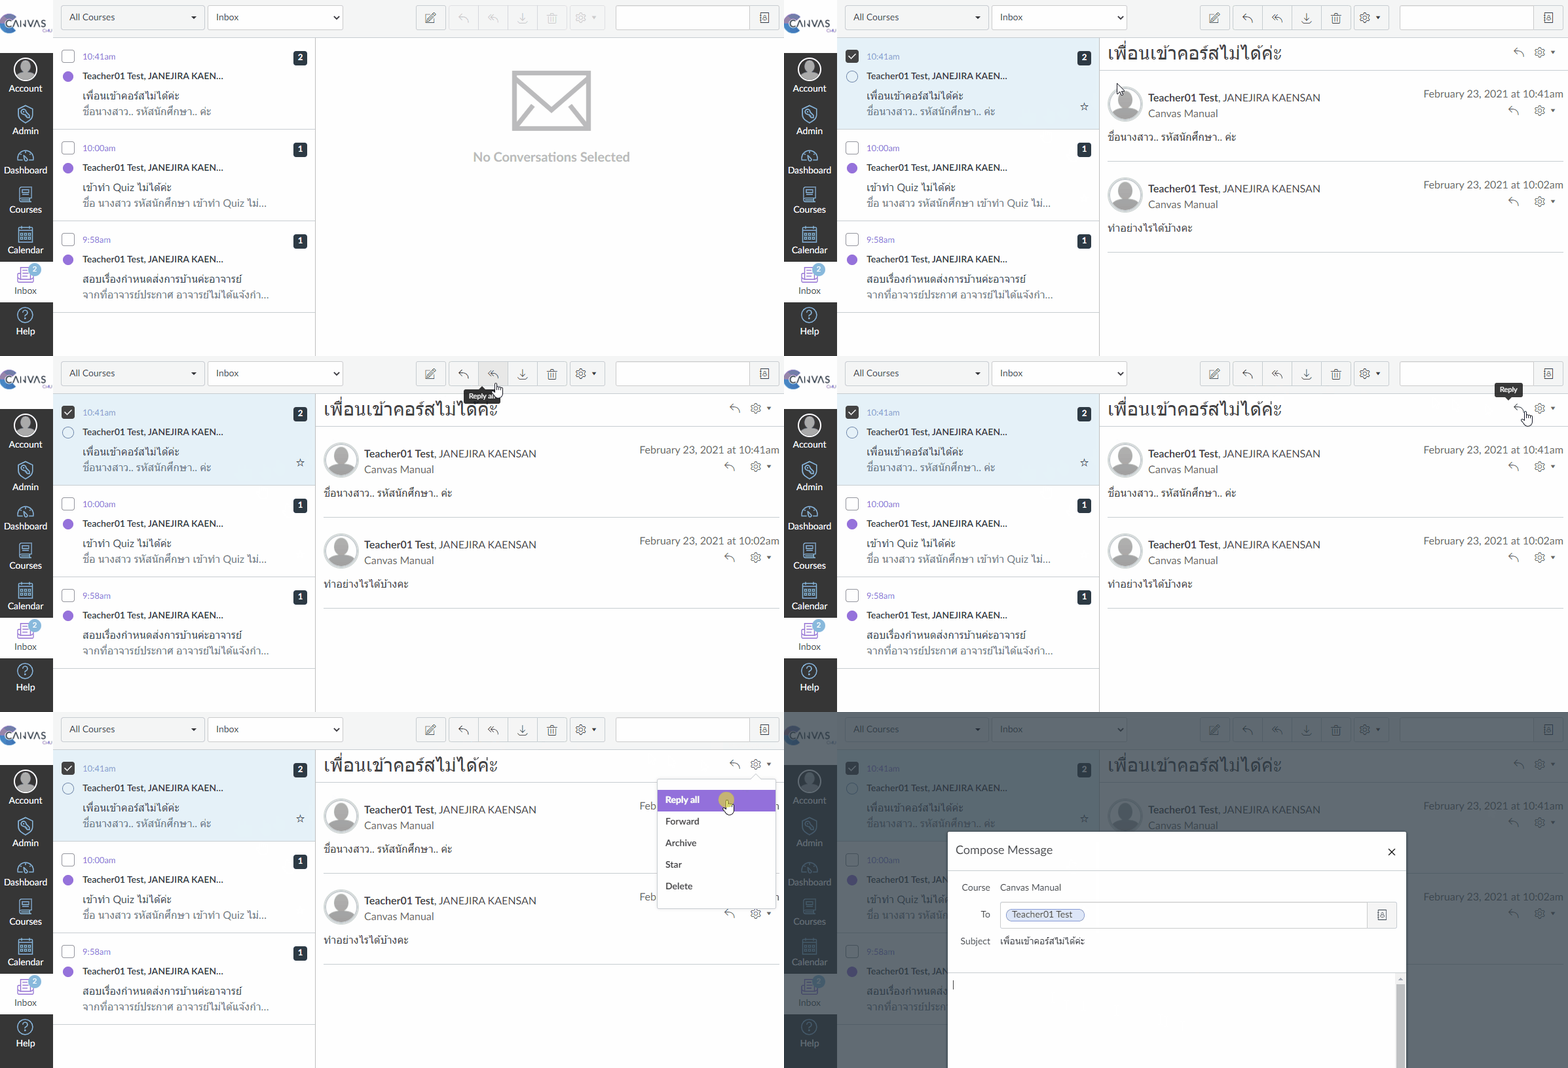
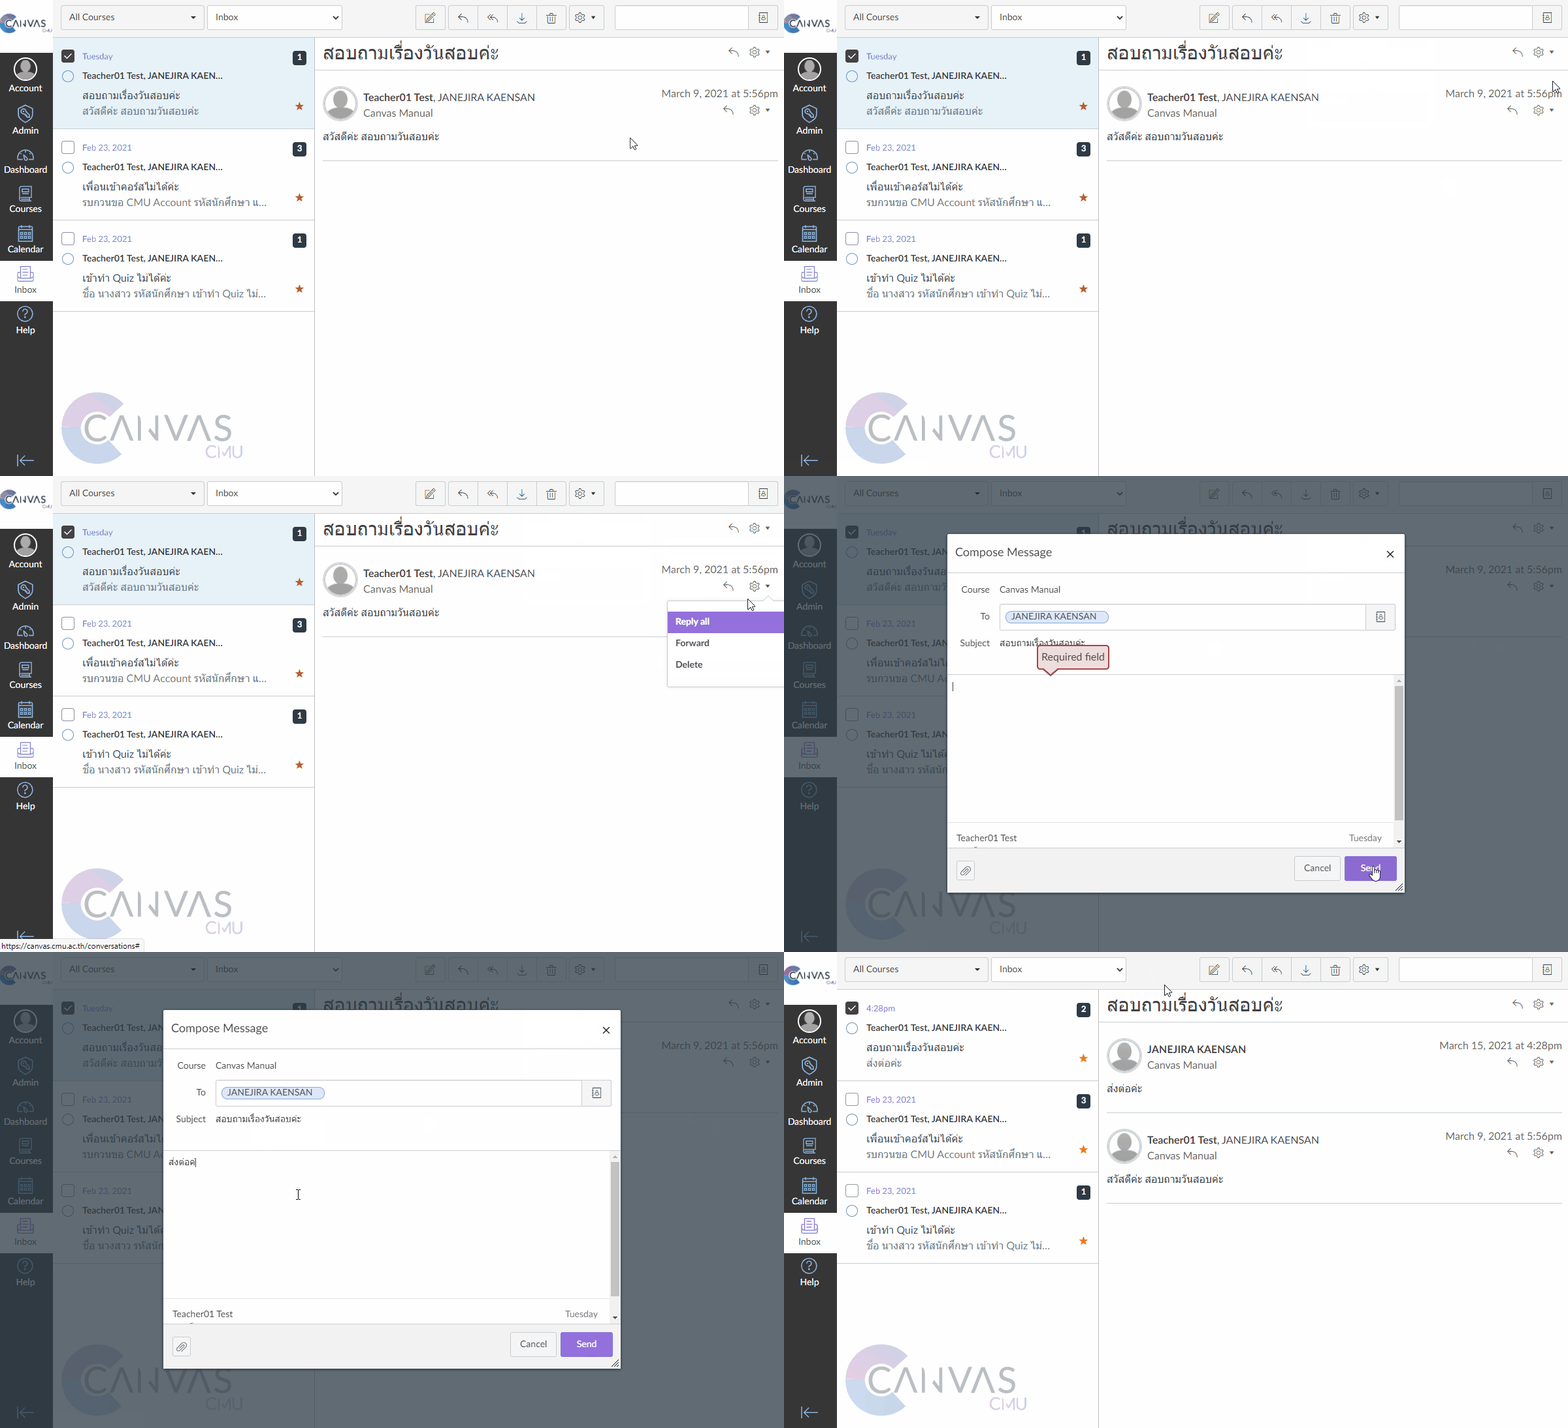
Select the message you want and press the reply icon ![]() on the toolbar or press
on the toolbar or press ![]() in the upper right corner of the message, or press
in the upper right corner of the message, or press ![]() and select the Reply All menu to reply to the message. Then type the message you want to reply to in the message box [1]. You can attach a file by pressing
and select the Reply All menu to reply to the message. Then type the message you want to reply to in the message box [1]. You can attach a file by pressing and sending to reply to that message.
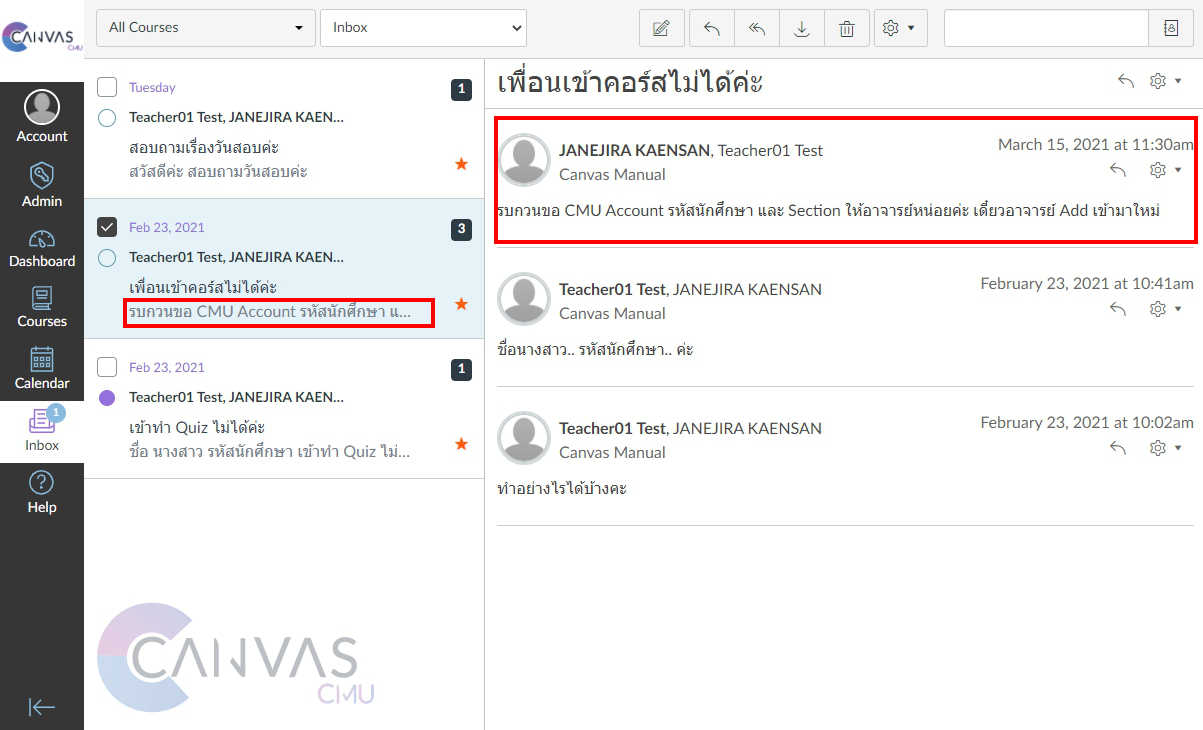
The text you reply will be displayed on the left side, like shown in the example, and the message and will be shown at the top of the message content.
Managing Inbox
Select Multiple Messages
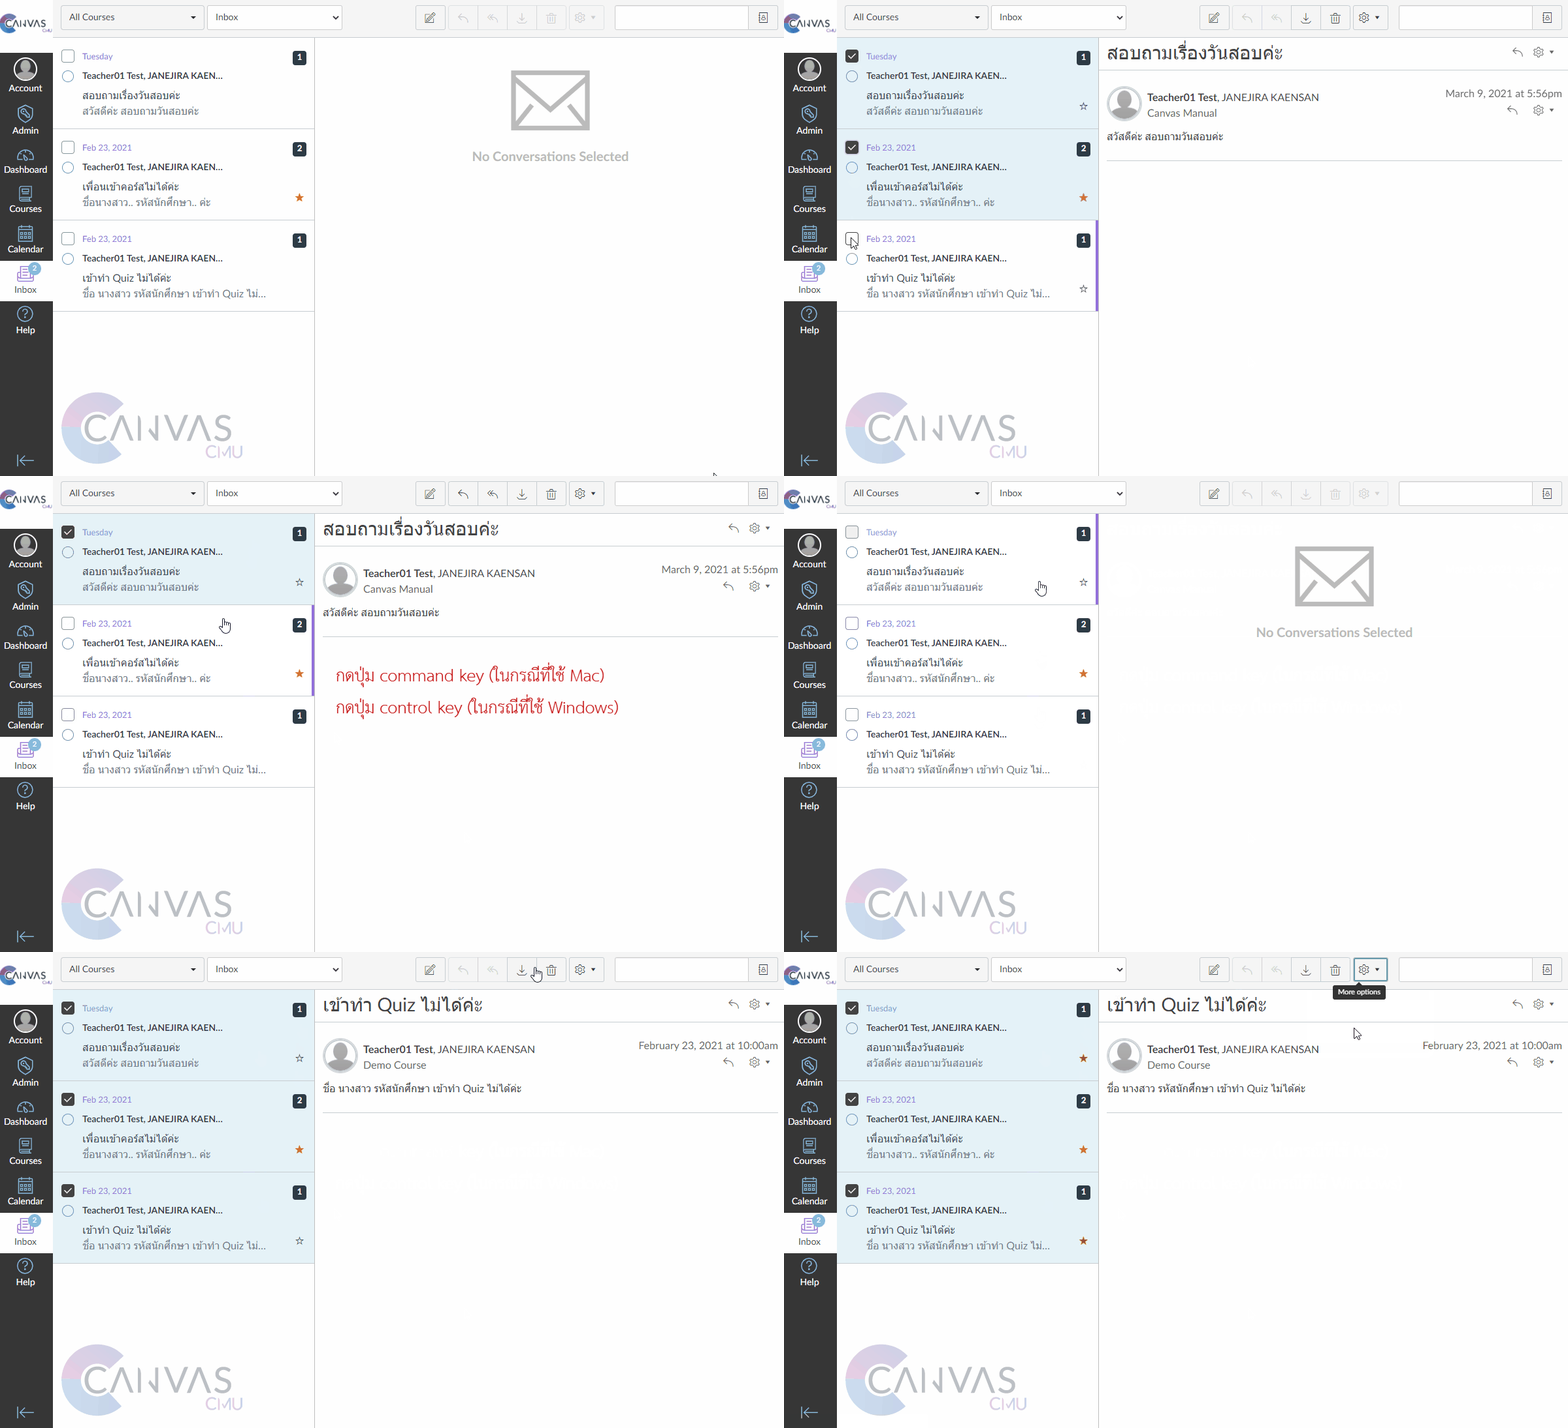
Select multiple messages to manage at once.
You can click on the square box ◽ in front of the date and time of the message.
Select other messages you want by:
clicking on the square box ◽ of those messages
or press the command key (if using Mac) / press the control key (if using Windows) while selecting each message you want
or select the first message you want, then press Shift and select the last message you want. All messages in between will be selected.
Select the menu you want to manage at the gear icon. All selected messages will be processed according to the menu you choose simultaneously.
Staring and Unstaring
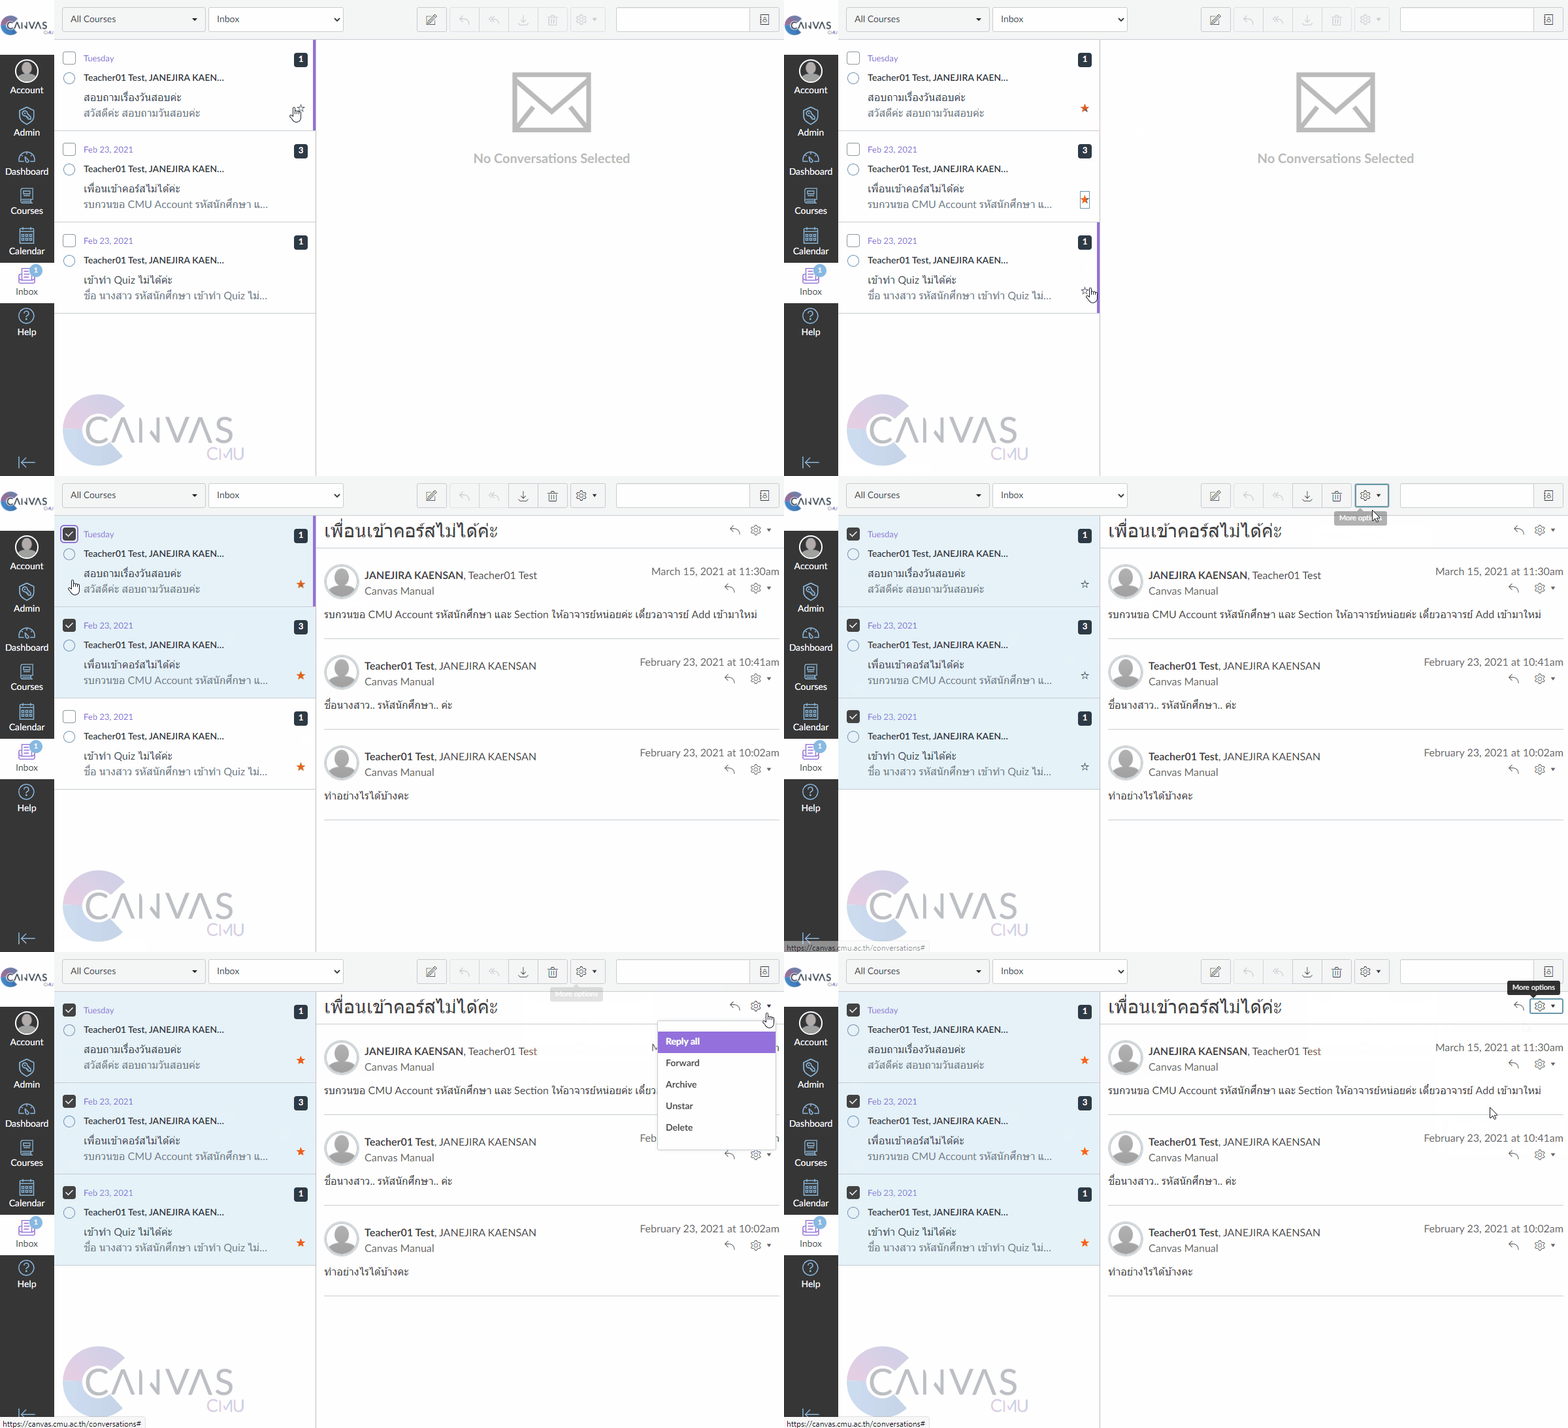
To star a conversation will help you see important messages quickly. There are 2 ways to do this:
Press the star icon ⭐ at the bottom right of the message box.
Select the message you want, then press
 icon and select Star ⭐
For unstarring, you can simply press the same button. If a message is already starred, pressing it again will unstar it.
Forwarding Message
You can forward a message by selecting the message you want, then pressing the![]() icon and select Forward. Then, select the recipient account you want. You can write a message and attach additional files before forwarding.
icon and select Forward. Then, select the recipient account you want. You can write a message and attach additional files before forwarding.
When you forward a message to more than 100 recipients, the system will automatically send the message individually to each person.
Deleting message
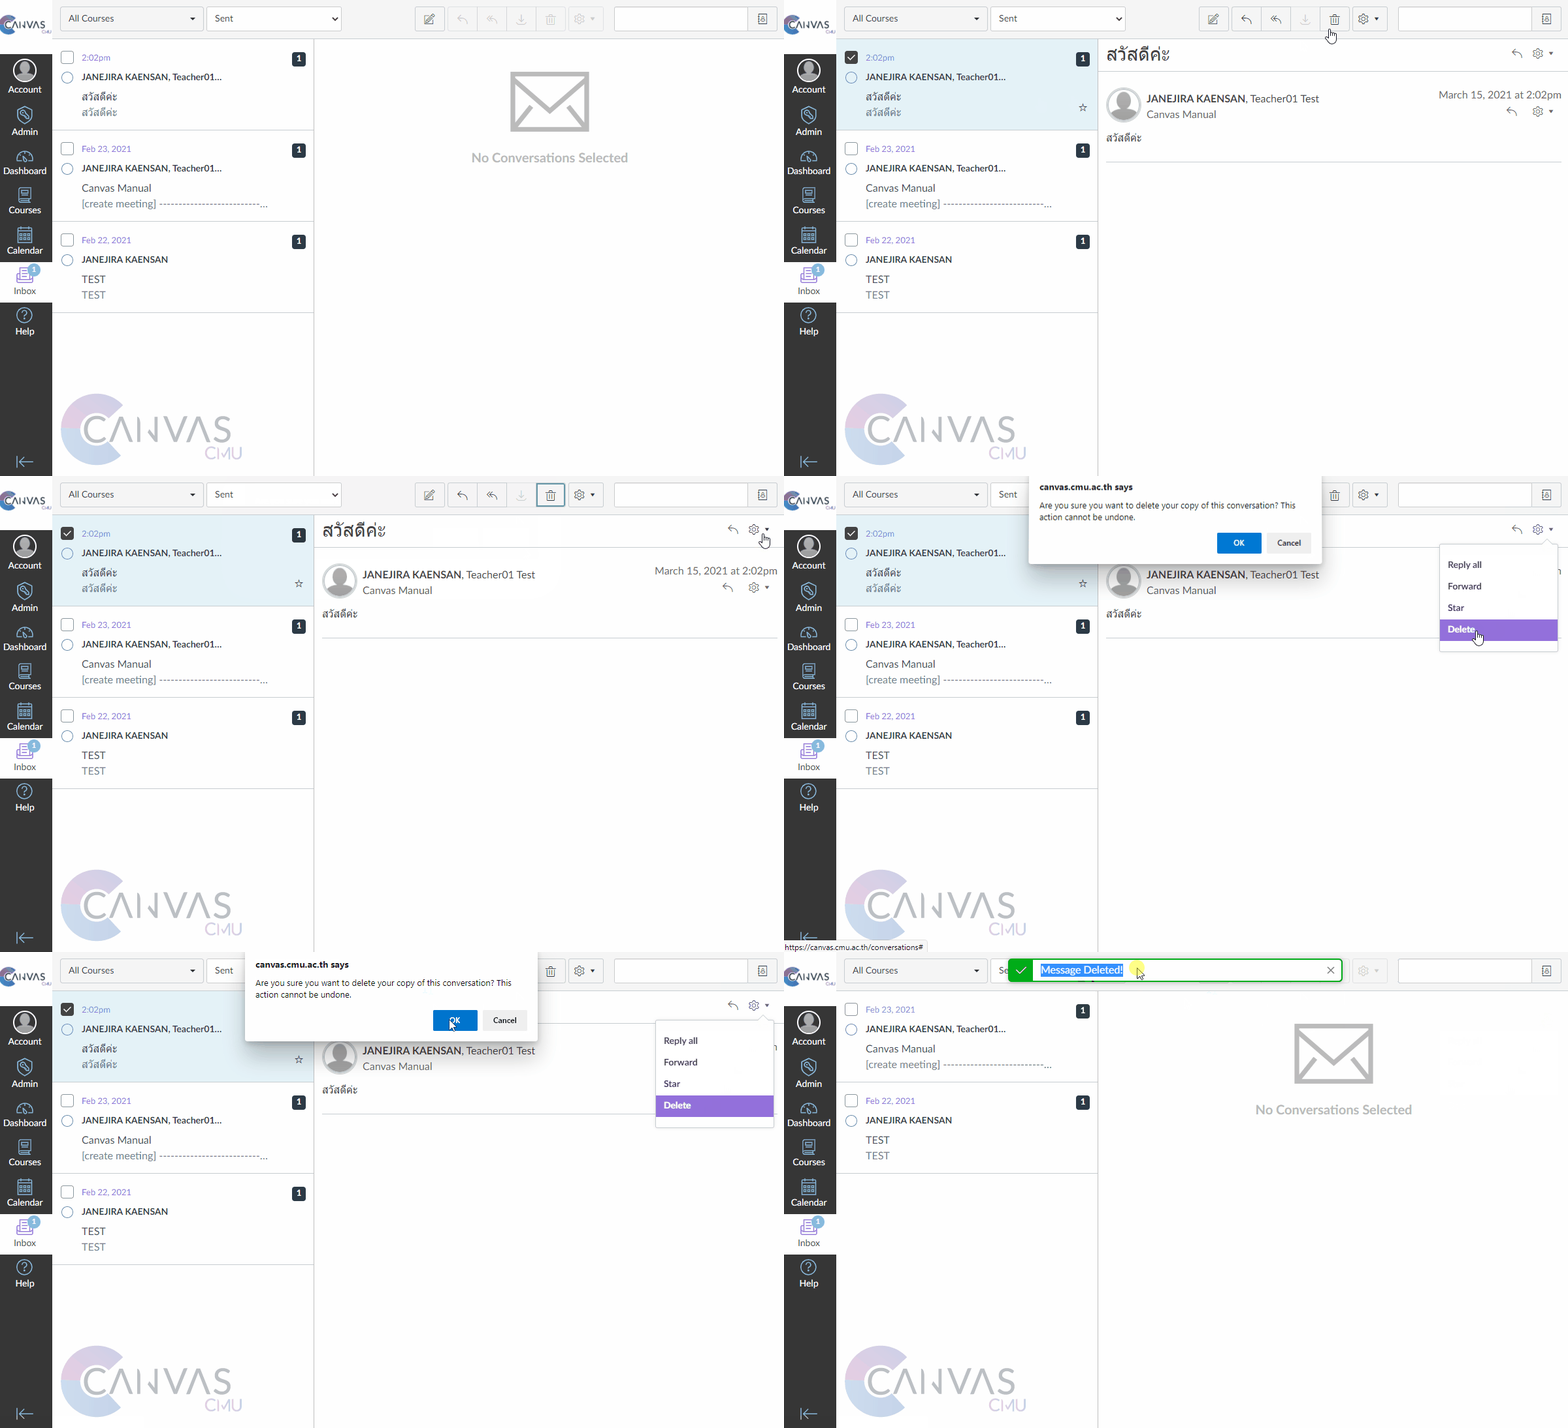
Select the message you want then click on the ![]() ican and select Delete or press the trash can icon on the toolbar. When you press Delete, the system will prompt as shown in the image. Press OK to confirm deletion.
ican and select Delete or press the trash can icon on the toolbar. When you press Delete, the system will prompt as shown in the image. Press OK to confirm deletion.

Archiving and Unarchiving
To Archive
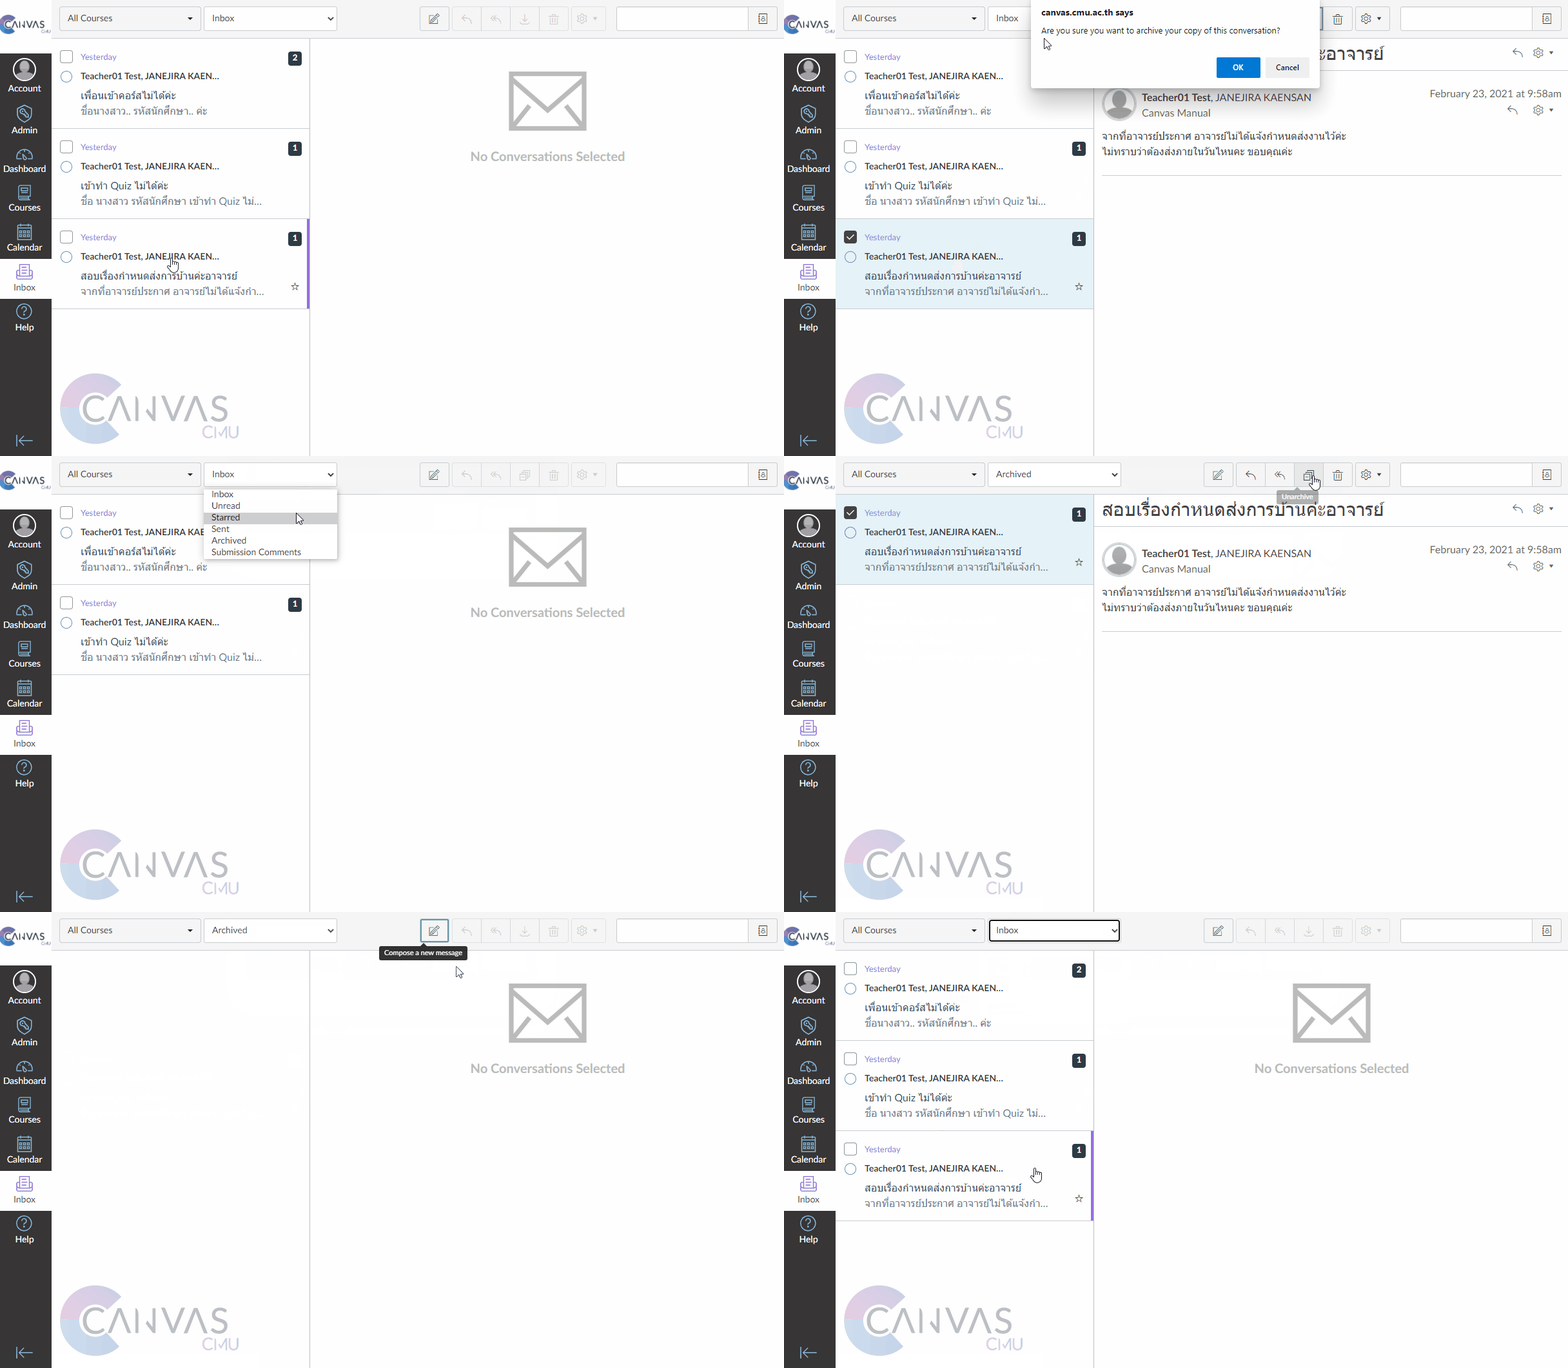
You can save messages, but they will be deleted from your mailbox. You can do this in 2 ways:
Select the message you want, then click the
 icon on the toolbar.
Select the message you want, then click the
 and select Archive.
To Unarchive
You can select the message and press Unarchive by pressing the ![]() icon.
icon.
You cannot archive the messages you sent.
Last updated